
LearnDash comes with built in support for accepting payments using different payment gateways and platforms. We’ve now expanded and integrated one of the most popular payment gateways out there, Razorpay.

With Razorpay you can set up customer payments, subscriptions, and even payment plans. This way you can start accepting payments from customers regardless of how they want to pay.
Table of Contents
Sign Up for a Razorpay Account
Before you can start using Razorpay as your main payment gateway, you first have to sign up and get a verified account with RazorPay.
Go to https://razorpay.com/ and sign up for a new account. Make sure you go through their verification process to verify or “KYC” your account.
Once you’ve set up and verified your Razorpay account, continue reading for instructions on configuring your Razorpay settings.
Enabling Subscriptions in Razorpay
Once you have your Razorpay account set up, for recurring payments, you have to enable and create subscriptions from your Razorpay account in order to properly activate the webhook events, to be discussed further below. This also make sure that the connection between Razorpay and LearnDash works correctly.
Check out this documentation to know how to enable and create subscriptions.
NOTE
Razorpay does not support infinite subscriptions. Subscriptions must have a set duration and the maximum duration is a 100 years.
Razorpay Settings
To get to the Razorpay settings page and manage this payment gateway:
- Navigate to LEARNDASH LMS > Settings
- Click on the Payments tab
- Look for Razorpay and click Manage
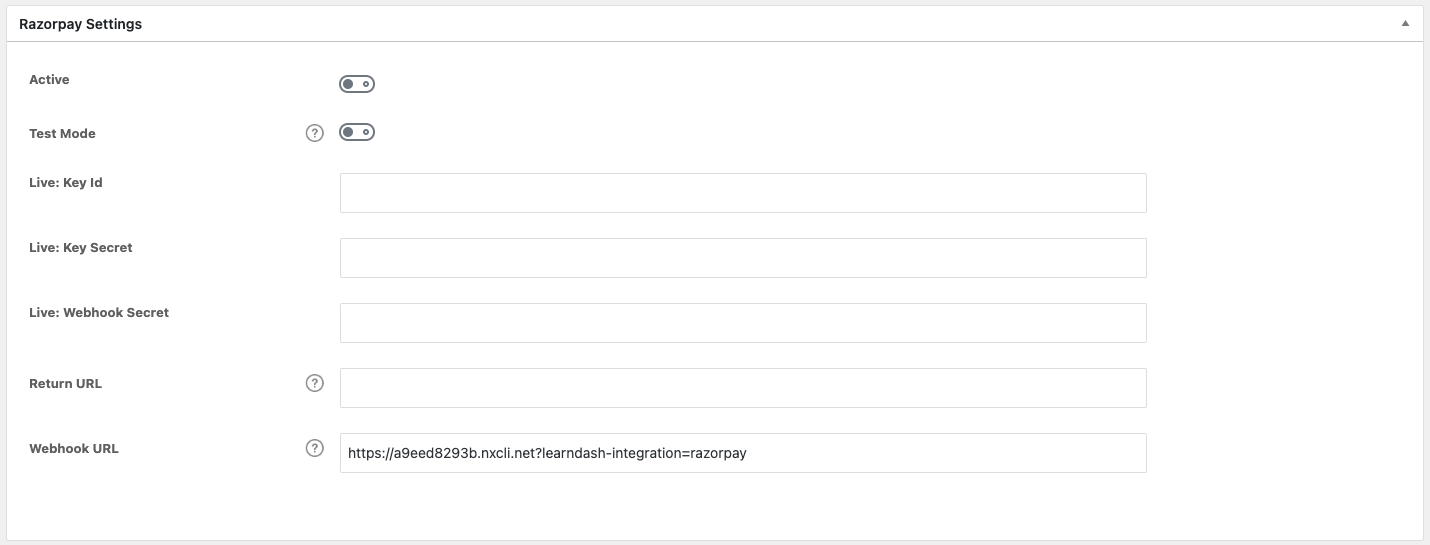
Active
This option indicates if Razorpay payment gateway is currently active or not.
Test Mode
This option indicates if Razorpay payment gateway is currently in “test mode” or not. If your Razorpay account is in “test mode” and your are still testing this payment gateway, best to leave this on. But don’t forget to disable this when you go live.
If you enable test mode, you will be presented an option to input your test keys and webhook secret. Use this only during testing. If you’re ready to go live, make sure you input the correct live keys below.
Locate Your Razorpay Keys
For this integration to work, you need the Key ID and Key Secret from Razorpay. In order to get these information:
- Log in to your Razorpay account.
- Go to Settings > API Keys
- Click on “Generate Keys” at the top right corner of the screen
- Copy the Key ID and Key Secret provided, make sure that you take note of them since they won’t be shown again. If you need to view them again, you’d have to generate new keys.
- Once you’ve taken note of the keys, proceed to the next steps on your LearnDash Site.
Live: Key Id
This is where you enter the Key ID that we generated in the previous step. Make sure you input the information correctly. Also make sure you input the LIVE keys, and not the test ones.
Live: Key Secret
This is where you enter the Key Secret that we generated in the previous step. Make sure you input the information correctly. Also make sure you input the LIVE keys, and not the test ones.
Add a Razorpay Webhook
Webhooks are important to make sure your site communicates well with Razorpay. In order for this integration to work, you must set certain webhook events on your Razorpay dashboard.
- Log in to your Razorpay account.
- Go to Settings > Webhooks
- Click “Add New Webhook” on the upper-right hand corner
- Fill out the form with the following information to finish creating your webhook:
- Webhook URL – Navigate to LEARNDASH LMS > Settings > Payments > Razorpay – Manage, and copy the auto populated Webhook URL and paste it here.
- Secret – Enter your own webhook secret to further secure your transactions. Razorpay does not auto-generate this information, so you have to come up with one yourself.
- Alert Email – Leave it as it is
- Active Events – Make sure the following events are added:
order.paid
subscription.authenticated
subscription.activated
subscription.completed
subscription.pending
subscription.halted
subscription.cancelled
subscription.paused
subscription.resumed - Once you’re done click on “Create Webhook”
Once the webhook is created, proceed to the next steps on the Razorpay settings page on LearnDash.
Live: Webhook Secret
Enter the webhook secret the you put in from the previous step. These two information must match in order for transactions to go through.
Return URL
This is the URL where users are redirected to after the purchase. If you leave this blank, the user will be redirected to the course/group page.
Webhook URL
This is the URL that we used to set up the webhooks. Do not change this section.
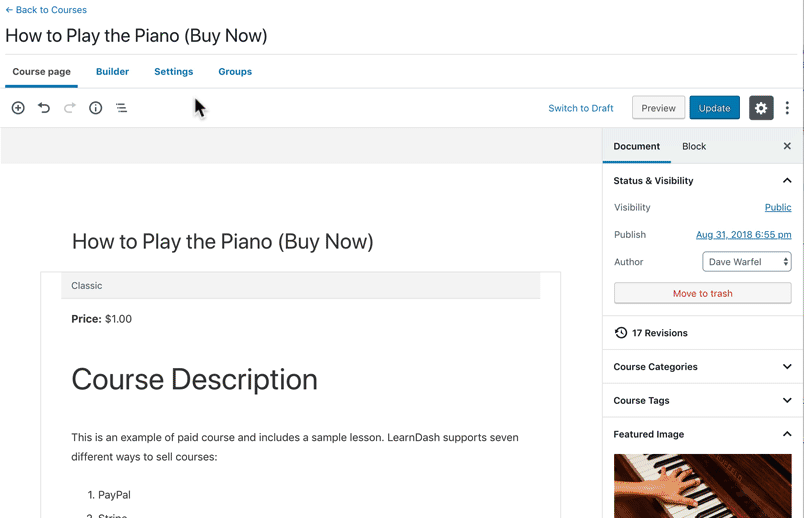
Course Configuration
After you’ve configured your Razorpay for LearnDash settings, the final thing you need to do is set up your course to accept payments.
- In the WordPress admin area, navigate to LEARNDASH LMS > COURSES
- Click on the course you’d like to sell with Razorpay
- Click on Settings at the top
- Scroll down to Course Access Settings
- Set the “Access Mode” to one of two values:
- Buy Now: Use “Buy Now” for one-time payments
- Recurring: Use “Recurring” if you’d like to set up a recurring payment (aka: subscription)
And finally, enter your price in the Course Price field. Ex: 29.99
- The currency symbol will be added automatically for you
- If your price is an even dollar amount, you may omit the decimal point & cents (ex:
29)
For recurring payments, you need to include the “Billing Cycle” in days, weeks, months or years.
NOTE
The minimum billing cycle value is 1 with the exception of daily plans where the minimum billing cycle value is 7
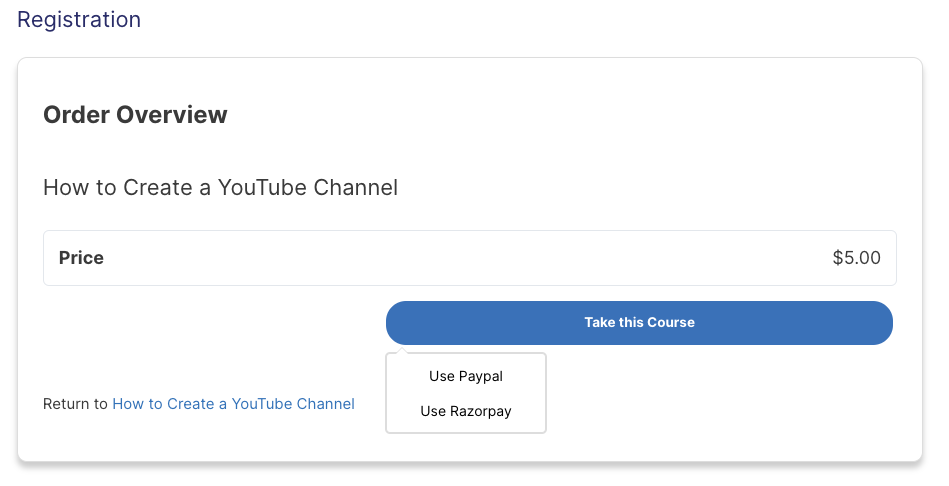
The User Experience
When a user tries to purchase a course with Razorpay depending on the registration flow that you have set, here’s what they will see after clicking the “Take This Course” or “Buy Now” button.
- They will be asked their phone number and email.
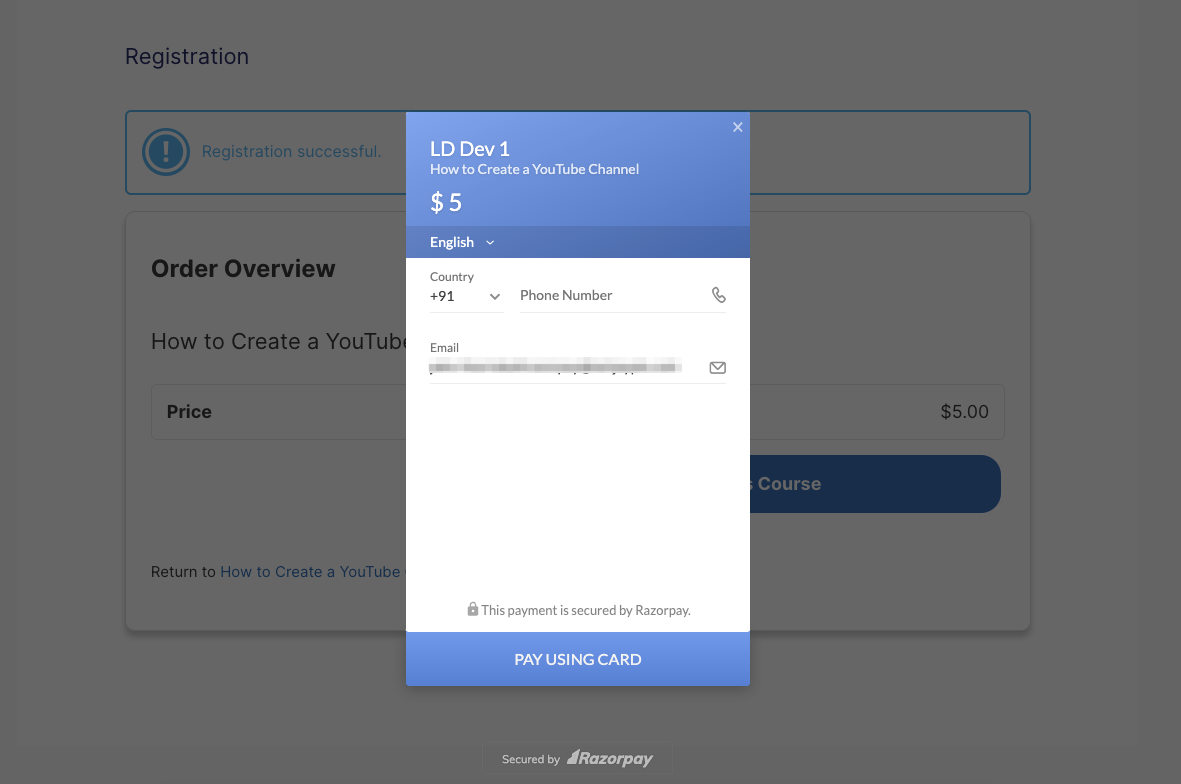
- They will then be given the option to pay with a card.
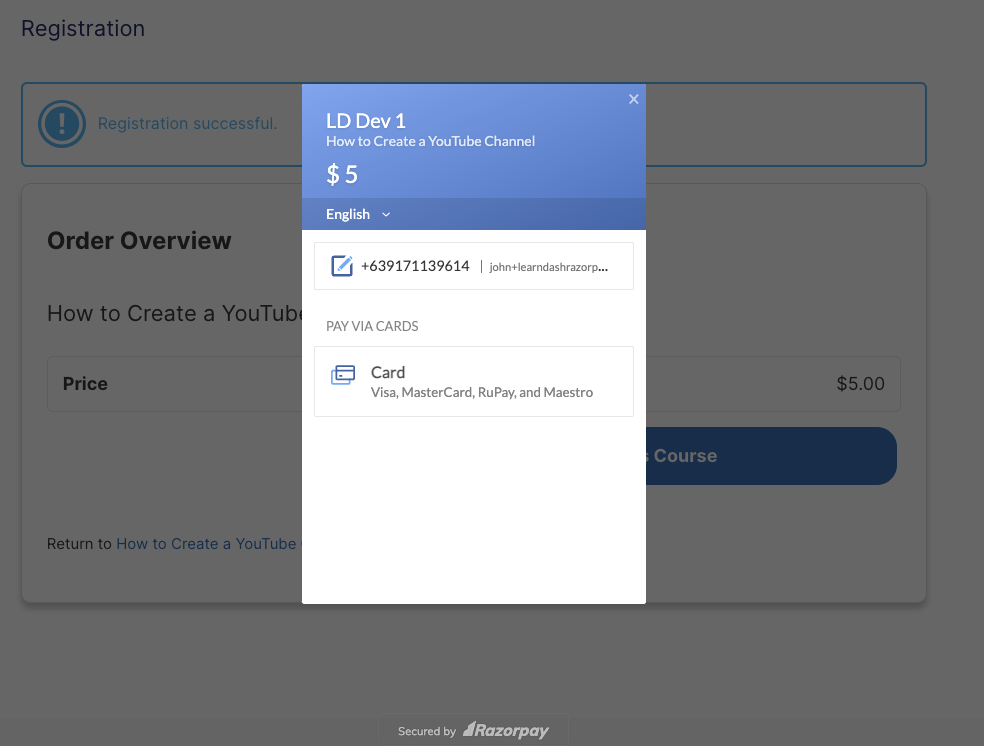
- Once the payment is completed, the user is then redirected to the page set in the redirect URL.
FAQ
Can I use both Paypal, Razorpay, and Stripe?
Yes, at checkout, you will be presented an option to pay using PayPal, Razorpay, or Credit Card.
When will I receive my money?
This is determined by your settings in Razorpay. Please reference Razorpay’s documentation on payouts.
Can I set up recurring payments (aka: subscriptions)?
Yes. In the course settings, just set your “Access Mode” to “Recurring,” and choose a billing cycle.
Can I offer coupons or discounts?
No. The LearnDash Razorpay integration does not allow you to offer discounts. Consider using our built in coupons feature or one of our other ecommerce or membership add-ons.
How do I issue refunds and/or cancel subscriptions for my customers?
Issuing refunds and canceling subscriptions is done from your Razorpay account, not from LearnDash or this add-on.
Are users automatically removed from a course if they are issued a refund?
No. You can remove the course access from their profile.
Are users automatically registered and enrolled to the courses after checkout?
Yes, if they went through the new registration flow, they will be automatically registered and enrolled to the courses after successful checkout. They will also be logged in after being redirected to back from the payments page.
Can I check the payments on my WordPress Dashboard?
No, you can check and manage the payments on your Razorpay dashboard.
Does Razorpay have transaction limits?
Yes, Razorpay does have transaction limits. Check out their documentation on the transaction limits here.
Why is it showing two transactions on my records?
For LearnDash 4.5.0 or newer, there will be 2 transaction record per single transaction. This is normal and your user will not be charged twice for each transaction. See our explanation on this on our Payment Transaction Records documentation.