Shortcodes and blocks provide you with additional ways to insert LearnDash content into your courses, pages, posts and other custom post types. This article will list out every piece of dynamic LearnDash content you can add to your site, and explain how to do it with both a shortcode and a block.
Creating a certificate? Check out our certificate shortcodes here
What’s the Difference? #
Shortcodes
- The original way to add dynamic content into the WordPress editor
- Can also be used to insert LearnDash content into page builders
- Contain options (also called parameters) to customize the information displayed
- Here’s an example shortcode, with one parameter:
[ld_course_list num="10"]
Blocks
- Only available when using the new content editor released in WordPress 5.0
- Contain all the same features and options as shortcodes
- Provide an easier interface in which to insert content & customize the options

Which One To Use? #
Every shortcode has a corresponding block, and every block has a corresponding shortcode. There are no feature differences between the two. Here are a few questions you can ask yourself to figure out which to use:
- Using the new WordPress editor (Gutenberg)? If yes, you can use either. You’ll likely find blocks easier to use, but if you’re comfortable with shortcodes, they are still available to you.
- Using the Classic Editor plugin? If yes, than you’ll need to use a shortcode.
- Using a page builder? If yes, you’ll need to use a shortcode. Blocks are not yet available in most page builders.
- Inserting content into a widget/sidebar? You’ll need to use a shortcode. Blocks are not yet available to use inside of widgets.
How to Use Them #
Before we explain what each block and shortcode does, let’s briefly discuss how to use them.
Blocks #


Blocks are inserted into the WordPress editor by clicking on the + icon, and then either searching for the name of the block, or scrolling through the list of available options. When you find the block you want to add, simply click on it.
After adding the block, you can customize the options in the block options panel in the sidebar. The options will vary depending on which block you have selected. This example shows some of the options for the LearnDash Course List block.
Shortcodes #
All shortcodes use square brackets ([ and ]), along with the name of the particular shortcode you’re using, and any parameters (options) you want to set.
Here’s a shortcode that displays a user’s LearnDash profile information, in its default state, with no parameters:
[ld_profile]Here’s that same shortcode with parameters added to it, to display the user’s courses in ascending order by course title:
[ld_profile orderby="title" order="ASC"]There’s one other way to use a shortcode. You can check to see if a certain thing is true, and if it is, output the contents contained within the shortcode. Here’s an example that would check to see if someone is enrolled in the course, and if they are, display a message.
[student]Only a student enrolled in the course would see this.[/student]You’ll notice this version has both an opening & a closing shortcode, with the closing shortcode being preceded with a forward slash (/).
DEVELOPERS
You can also add shortcodes to your theme files or custom plugins via the do_shortcode() function.
All LearnDash Blocks & Shortcodes #
Here’s a complete list of all available LearnDash blocks/shortcodes. Click on the name for more information on how to use them, as well as all the available parameters.
| Block | Shortcode | Description |
|---|---|---|
| Common LearnDash Blocks/Shortcodes | ||
| LearnDash Profile | [ld_profile] | Displays basic user information (name, avatar, etc.), as well as total courses, course points, a list of enrolled courses, quiz results & certificates earned. |
| LearnDash User Course Points | [ld_user_course_points] | Displays the earned course points, for that user, on any page. |
| LearnDash Course Progress | [learndash_course_progress] | Displays a progress bar with the user’s progress for that course. |
| LearnDash Course List | [ld_course_list] | Displays a list of courses. Many options are available to filter & customize the output. When the Course Grid add-on is enabled, it will display courses in a grid layout. |
| LearnDash Lesson List | [ld_lesson_list] | Similar to [ld_course_list] but displays a list of lessons. Also works with the Course Grid add-on. |
| LearnDash Topic List | [ld_topic_list] | Similar to [ld_course_list] but displays a list of topics. Also works with the Course Grid add-on. |
| LearnDash Quiz List | [ld_quiz_list] | Similar to [ld_course_list] but displays a list of quizzes. Also works with the Course Grid add-on. |
| LearnDash Group List | [ld_group_list] | Similar to [ld_course_list] but displays a list of groups. Also works with the Course Grid add-on. |
| LearnDash Course Content | [course_content] | Displays a complete list of lessons, topics & quizzes associated with that course. |
| LearnDash User Groups | [user_groups] | Displays the list of groups users are assigned to as either users or leaders. |
| LearnDash Course Expire Status | [ld_course_expire_status] | Displays the expiration date of a course for the current user. |
| LearnDash Video | [ld_video] | Displays a video anywhere within a lesson or topic page. You must be usingvideo progressionfor this shortcode to work. |
| LearnDash Payment Buttons | [learndash_payment_buttons] | Displays the payment button for a particular course, anywhere on the page. |
| LearnDash Course Info | [ld_course_info] | Displays a list of registered courses, course progress details & all quizzes the user has taken. |
| LearnDash Login | [learndash_login] | Displays a login link that reveals the LearnDash login & registration pop-up modal when clicked. |
| LearnDash Certificate | [ld_certificate] | Displays a download link of an earned certificate. |
| LearnDash Resume Course | [ld_course_resume] | Returns a user to the last step in the Course (format: link/button). |
| LearnDash Reset Password | [ld_reset_password] | Creates a reset password form for the users to reset their passwords. |
| Conditionally Display Content Show/Hide content for certain users or groups | ||
| LearnDash Visitor | | |
[visitor]Displays content if a user is <strong>NOT</strong> enrolled in a course. Requires a closing[/visitor][student]Displays content if a user <strong>IS</strong> enrolled in a course. Can also be used to display content to individual users (based on user id). Requires a closing[/student][course_notstarted]Displays content if a user has access to a course, but has not completed any steps. Requires a closing[/course_notstarted][course_inprogress]Displays content if a user has access to a course, has completed at least one step, but has not finished the entire course. Requires a closing[/course_inprogress][course_complete]Displays content if a user <strong>has fully completed</strong> a course. Requires a closing[/course_complete][ld_quiz_complete]Displays content if a user has completed a quiz. Requires a closing[/ld_quiz_complete][ld_group]Displays a specified message to group enrollees.Requires specified group ID and a closing [/ld_group]Certificate Shortcodes
View our list of certificate shortcodes
Common Blocks and Shortcodes #
Let’s talk about how to use the main LearnDash shortcodes, and discuss the options available with each one. The method for customizing LearnDash blocks is the same for each block, so we’re going to focus on the code needed to customize the shortcodes. Remember, if you’re using the Gutenberg blocks, all the same options are available in the block options panel in the sidebar.
LearnDash Profile #
The LearnDash Profile block/shortcode can be used to build a student profile. By default, it will output the following information related to the currently logged-in user:
- Avatar (profile image)
- Name
- Link to edit profile
- Total number of courses enrolled in, courses completed, certificates awarded & points earned
- List of registered courses, which includes:
- ability to search courses
- course progress indicators
- links to download certificates
- quizzes taken, along with date, scores & statistics

You can also use the button at the top to quickly expand/collapse all registered course information.
The following parameters are available when using the[ld_profile] shortcode:
per_page="10"– sets the number of courses to display on one page, before pagination is usedcourse_points_user="no"– prevents the display of a user’s earned course points (default is “yes”)expand_all="yes"– expands all sections of the profile (default is “no”)orderby="title"– determines how the courses should be sorted (default is “id”). This should be used in conjunction with theorderparameter. See full list of orderby parametersorder="ASC"– determines the order in which courses are sorted. This should be used in conjunction with theorderbyparameter. Use either “ASC” or “DESC”.profile_link="no"– determines whether or not the profile link is shown or hidden. The default is yes.show_quizzes="no"– determines whether or not the users quiz attempts are shown or hidden. The default is yes.show_search="no"– determines whether the search functions is shown. The default is yes.show_header="no"– determines if the header is shown or hidden. The default is yes.quiz_num="5"– sets number of quizzes to show per page when quizzes are shown & expanded. The default is to use whatever is set usingper_pageoption.
LearnDash User Course Points #
You likely won’t find many uses for the [ld_user_course_points] shortcode, but it could be used to build your own student profile page using a page builder.
Simply insert [ld_user_course_points] onto its own line, or use the block, and it will output this:
Earned Course Points: 100
This will display the total, cumulative points that the current user has received.This includes both “earned” course points as well as any “extra” course points you’ve assigned to the user via their WordPress profile.
There is only one parameter, if you want to target a specific user ID: [ld_user_course_points user_id="5"]
This would show the course points for the user with an ID of 5. The default usage will automatically show points for the logged-in user.
LearnDash Course Progress #
The [learndash_course_progress] shortcode displays a progress bar with the current user’s progress for that course.

It is most commonly used on a course, lesson, topic or quiz page, and it automatically detects 1) which course is currently being accessed, and 2) which user is logged in.
You’ll typically use the default [learndash_course_progress] shortcode without any parameters, but if you’re using it outside of a course, or for a specific user, there are two options you can use:
[learndash_course_progress user_id="5"]– Displays the progress for a specific user[learndash_course_progress course_id="12"]– Displays the progress for a specific course
This shortcode works great with page builders when building a custom layout for your courses, lessons & topics.
LearnDash Course List #
The [ld_course_list] shortcode displays a list of courses, and it comes with a lot of parameters to customize which courses are shown and how they are laid out. The LearnDash Course List is most commonly used in conjunction with the Course Grid add-on.

Because of the long list of options available, please head over to our Course Grid add-on article to learn about all of the available options.
This block allows for the display a sub-set of enrolled courses based on the course progress status. This is only available when the “My Courses” option is set to show “Enrolled Courses Only”.
LearnDash Lesson List #
The LearnDash Lesson List works in much the same way as the Course List, only it displays lessons instead of courses. Here’s an example of it in use:

This shortcode would be best used on a course page, instead of using the default course content table. Be sure to upload a featured image for each lesson to replace the placeholder images.
Here’s an example on how to use this shortcode:
[ld_lesson_list course_id="yyxx"]You can specify a specific course by adding the course_id parameter to filter the lessons you want to display.
LearnDash Topic List #
The LearnDash Topic List works in much the same way as the Lesson List,only it displays topics instead of lessons.
This would be best used on a lesson page that contains at least a few topics. A featured image will also replace these placeholder images.
Using the lesson_id parameter allows you to display a list of quizzes, or topics, associated with a specific lesson.
Here is an example of how to use the shortcode:
[ld_topic_list lesson_id="xxxx" course_id="yyxx"]
In this example, you can specify the lesson_id and course_id with the shortcode to filter the topics you want displayed.
LearnDash Quiz List #
The LearnDash Quiz List works in much the same way as the Lesson List, only it displays quizzes instead of lessons. If your course offers multiple quizzes, you might find this shortcode useful.
Typically, however, quizzes are best displayed either…
- in the course content table, along with the course they are associated with,
- in the course navigation widget, wherever they fall in the natural course progress, or
- at the bottom of a lesson or topic page that the quiz is assigned to (inserted automatically)
Using the lesson_id parameter allows you to display a list of quizzes, or topics, associated with a specific lesson.
LearnDash Group List #
The LearnDash Group List works in much the same way as the Course List, only it displays groups instead of courses. If you offer multiple groups that allow for self-enrollment, you might find this shortcode useful.
The LearnDash Group List can be used in conjunction with the Course Grid add-on.
Because of the long list of options available, please head over to our Course Grid add-on article to learn about all of the available options.
LearnDash Course Content #
The LearnDash Course Content block/shortcode is an exact replica of the default course content table that is displayed on course pages by default (below any content you add). It displays a complete overview of the course, along with the user’s progress. In it, you’ll find all Lessons, Topics and Quizzes that are assigned to the course. You can show/hide topics & quizzes that are tied to lessons, and you’ll see a status icon that displays the user’s status for that particular lesson/topic/quiz.

There are two really valuable use cases for this shortcode:
- insert into a custom course landing page (if using a page builder)
- insert into a sales page powered by WooCommerce, Easy Digital Downloads, MemberPress, or another ecommerce/checkout solution
When using this shortcode on any other page besides a course page, you’ll need to use the course_id parameter. This tells LearnDash which course you want to display content for.
[course_content course_id="12"]This would display the course content table for the course with an ID of 12.
LearnDash User Groups #
The LearnDash User Groups block/shortcodedisplays the list of groups that a user is assigned to.
LearnDash Course Expire Status #
This block/shortcode will display the date in which a course expires for the currently logged-in user. You must enable the “Expire Access” setting on the course edit screen for this to work.
Course access will expire on: December 31, 2019
If used on a course page, [ld_course_expire_status] will automatically detect the course, and the user, and display a message. The default messages are as follows:
- If a course expires in the future: “Course access will expire on: {date}”
- If a course has already expired: “Course access expired on: {date}”
You can customize the text before and after the date by using the following parameters:
label_before #
This is displayed before the date:
[ld_course_expire_status label_before="This course expired on "]label_after #
This is displayed after the date:
[ld_course_expire_status label_after=". Please renew your membership to regain access."]format #
This changes the format of the date used. By default, we’ll use your WordPress date settings. See a full list of date formatting options here.
[ld_course_expire_status format="F j, Y"]You can also use the course_id & user_id parameters, although you will likely not need them because we identify these automatically.
Here’s an example of all parameters used together:
[ld_course_expire_status format="F j, Y" label_before="This course expired on " label_after=". Please renew your membership." course_id="12" user_id="5"][ld_video] #
The [ld_video] shortcode is only available as a shortcode. There is no Gutenberg block for it yet. However, you can still use it with the Gutenberg editor by utilizing the shortcode block:

This only works if you’re using our built-in Video Progression feature. This must be enabled on the lesson or topic page in order for it to work, and a URL to your video must be entered.
Learn how to set up video progression here
With video progression, by default, your video is placed above the course content. However, if you want to place the video somewhere in the middle of your content, you would use the [ld_video] shortcode.
There are no parameters. Simply add [ld_video] anywhere within your course content (must be on its own line).
This is great for use with page builders when customizing the layout of your lesson/topic pages. You have complete control of where to include your video.
LearnDash Payment Buttons #
The LearnDash Payment Buttons should only be used if you’re utilizing one of the default LearnDash payment methods (Stripe, PayPal or 2Checkout). If you’re using WooCommerce, MemberPress, or any other platform to process payment, this block/shortcode will not work.
By default, if your course is set to any other status except for “Open,” you’ll see a “Take This Course” button on the course page. If you’re using one of LearnDash’s default payment methods, this button will begin the payment/checkout process for the user.
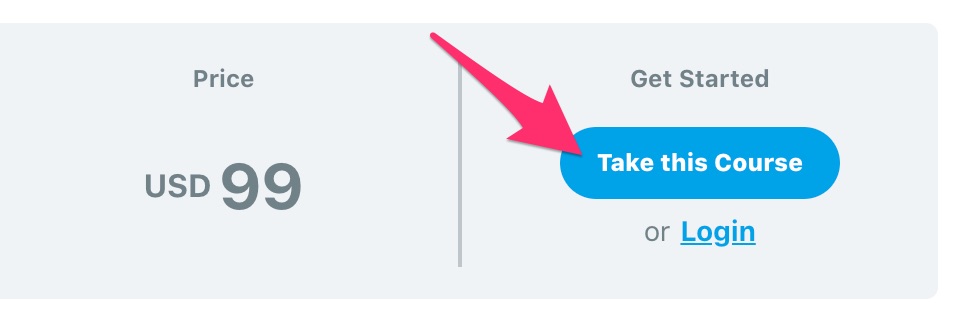
If you want to place this button somewhere else on your page (i.e. if you’re using a page builder to create a custom course landing page), you can use the [learndash_payment_buttons] shortcode or block to insert the button anywhere.
If not used directly on a course page, you’ll want to include the course_id:
[learndash_payment_buttons course_id="12"]LearnDash Course Info #
This block/shortcode could be used to help build part of a student profile page. LearnDash Course Info displays 3 things:
- list of registered courses, along with a thumbnail image
- list of course progress details, which includes:
- course status: Not Started, In Progress or Completed
- X out of Y steps completed
- the date you started the course
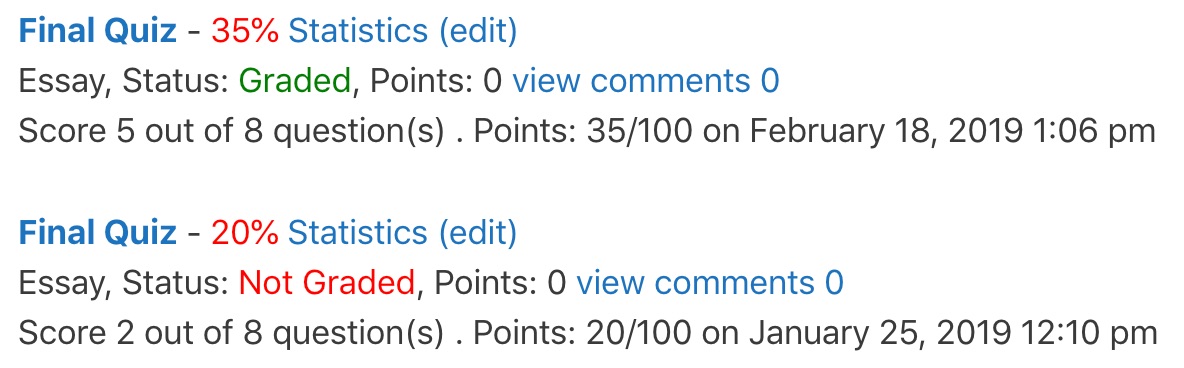
- list of quizzes you’ve taken, which includes:
- quiz name & link to quiz page
- score
- points awarded
- link to statistics
- date you took it
- grading status
Here’s what the registered courses looks like when you’ve included a featured image:

Here’s an example of the course progress information:

And here’s the quiz information:
The output might differ slightly depending on which theme you’re using.
You can use any of the following parameters to customize the output of [ld_course_info] (or use a bunch of them together). These are also available when using the Gutenberg block.
registered_show_thumbnail– set to “true” to show the thumbnail, or “false” to hide itregistered_num– limits the number of courses displayedregistered_orderby– order the registered courses by ID, title, date and moreregistered_order– set to either ascending (“ASC”) or descending (“DESC”)progress_num-limits the number of courses displayed in the progress sectionprogress_orderby-order courses in the progress section by ID, title, date and moreprogress_order-set to either ascending (“ASC”) or descending (“DESC”)quiz_num– limit the number of quizzes displayedquiz_orderby-order quizzes by ID, title, date and morequiz_order– set to either ascending (“ASC”) or descending (“DESC”)
You can also specify a user_id, but typically you don’t need this as we’ll automatically assign it to the current user.
LearnDash Login #
Use the LearnDash Login shortcode to add a Login link to a page, post, sidebar widget, or menu item. When clicked, the LearnDash Login Modal pops-up.

When a user is logged-in, the link will update to: Logout. When clicked, a user will be logged-out of the site.
This shortcode will only work if LearnDash Login & Registration is enabled.
Here are available parameters for this shortcode:
'url'              => false,
'label'            => false,
'icon'             => false,
'placement'        => false,
'class'            => false,
'button'           => false,

'login_url'        => '',
'login_label'      => __( 'Login', 'learndash' ),
'login_icon'       => 'login',
'login_placement'  => 'left',
'login_class'      => 'ld-login',
'login_button'     => 'true',

'logout_url'       => '',
'logout_label'     => __( 'Logout', 'learndash' ),
'logout_icon'      => 'arrow-right',
'logout_placement' => 'right',
'logout_class'     => 'ld-logout',
'logout_button'    => '',
Here’s a sample use case for these attributes:
[learndash_login logout_label="Custom Logout label"]LearnDash Certificate #
This displays a Certificate download link for an earned certificate. One of the following parameters is required in order for the appropriate download link is displayed:
course_id– the ID number of a specific coursequiz_id– the ID number of a specific quiz
If you want to display a certificate for a certain quiz, both parameters above need to be used:
[ld_certificate course_id="123" quiz_id="456"]There are also optional parameters:
user_id– option to show link for a specific User (leave blank for current User)group_id– option to show link to a specific grouplabel– label for certificate button/button link shown to userclass– HTML class for link elementcontext– user defined value to be passed into shortcode handlercallback– custom callback function to be used instead of default output
LearnDash Resume Course #
Displays an option for Users to quickly return to the last step in a Course (format: link/button).
Supported Parameters:
course_id– enter single Course ID for the resume link (leave blank if used within a Course or if used outside of a course page, it will automatically pick up the last active course)user_id– display resume option for a specific User (leave blank for current User)label– label for link/button shown to User
Conditionally Display Content #
These blocks & shortcodes work a little differently than the ones above. These help you show or hide specific information for certain users, based on their enrollment status.
You can include HTML, images, video or anything else you’d like inside of these shortcodes.
All of these shortcodes require a beginning and ending like so:
[shortcode]and an ending[/shortcode]Be sure to include both.
When using these Gutenberg blocks, you’ll see a small indicator when hovering over the block to let you know that the content you add will be placed inside the conditional block:

When using Elementor Templates, the autop="false" can be added within the shortcode for all conditionally displayed content to avoid having unwanted <p> and <br> elements from appearing throughout the template. This can be useful to avoid layout issues within templates.
LearnDash Visitor
[visitor] You can use this block/shortcode to only show certain information to students who are not yet enrolled in a course. It is most commonly used on the course page itself, but can also be used on a custom sales page by specifying a course_id. Here’s an example:
[visitor course_id="12"]This will only be seen by users who DO NOT have access to the course. You could provide a link to a signup form or email capture here.[/visitor]LearnDash Student
[student] Use this shortcode to only display some content to a student who has access to the course.
[student course_id="12"]This will only be seen by users who HAVE ACCESS to the course.[/student]You can also specify multiple course IDs on the shortcode with the following format:
[student course_id="4523,2894"]This will only be seen by users who HAVE ACCESS to both the courses.[/student]If you want to limit to a specific group(s), you can use the group_id parameter just like the course_id parameter and specify the ID of the group(s) you want to only show content to for those that are enrolled into those groups.
You could also add a user_id parameter to the [student] shortcode if you wanted to target a specific student by his or her ID.
[student user_id="5"] This will only be seen by the user whose ID is 5. No other students will see it. [/student]LearnDash Course Not Started
[course_notstarted] This will show content to those who have not completed any steps in the course thus far.
[course_notstarted course_id="12"]This will only be seen by users who have not completed any steps in the course yet. You could provide a message encouraging them to get started.[/course_notstarted]LearnDash Course In Progress
[course_inprogress] This shows content to a student who has started the course, but not yet finished it.
[course_inprogress course_id="12"]This will only be seen by users who have started the course (completed at least one step), but not yet finished it. You could provide encouragement for them to finish it soon.[/course_inprogress]LearnDash Course Complete
[course_complete] Use the [course_complete] shortcode to show content only to students who have fully completed a course (completed all steps & passed all required quizzes).
[course_complete course_id="12"]This will only be seen by users who have fully completed the course. You could provide a link to a certificate here, or some related courses they might want to try next.[/course_complete]LearnDash Quiz Complete
[ld_quiz_complete] Use the [ld_quiz_complete] shortcode to show content only to students who have fully completed a quiz.
[ld_quiz_complete quiz_id="32"]This will only be seen by users who have fully completed the course. You could provide a link to a certificate here, or some related courses they might want to try next.[/ld_quiz_complete]LearnDash Group Message
[ld_group] Use the [ld_group] shortcode to show content only to students enrolled in the specified group. Requires group ID.
[ld_group group_id="32"]This will only be seen by users who have access to the group with the ID of 32.[/ld_group]LearnDash Reset Password #
The new LearnDash Reset Password block allows you to set a “Reset Password” page for your users.
Just create a new page and insert the block anywhere you want. This will allow your users to reset their account passwords whenever they need to.
You can also use the shortcode [ld_reset_password] instead of the block and you can set the width parameter.
On the block settings, you can change the width of the form to your liking.