LearnDash coupons are a way for you to easily offer promotions and discounts to your users before they purchase your courses.
With LearnDash coupons, you can create coupons for your users. You can even set an expiry date and usage limits to your coupons to have them work to your liking.
NOTE
LearnDash Coupons work with the new Registration Flow in LD 4.0. You must have the registration option enabled and the registration pages set in order to use the coupons for new users.
Check out our guide to the new Registration Flow here.
NOTE
LearnDash coupons only support courses or groups that are set to “Buy Now” Course or Group Access setting for now. They do not work for “Recurring” courses or groups. If you want to learn more about Course Access settings, you can check the documentation here.
Table of Contents
Creating Your Coupons
To create your LearnDash Coupons,
- Navigate to LEARNDASH LMS > Coupons
- Click on “Add New”
- Add a Coupon title
- Enter the coupon slug – the coupon slug is the unique identifier to the coupon within WordPress. The coupon settings below will still take effect.
From here you can personalize your coupons to your liking.
Coupon Settings
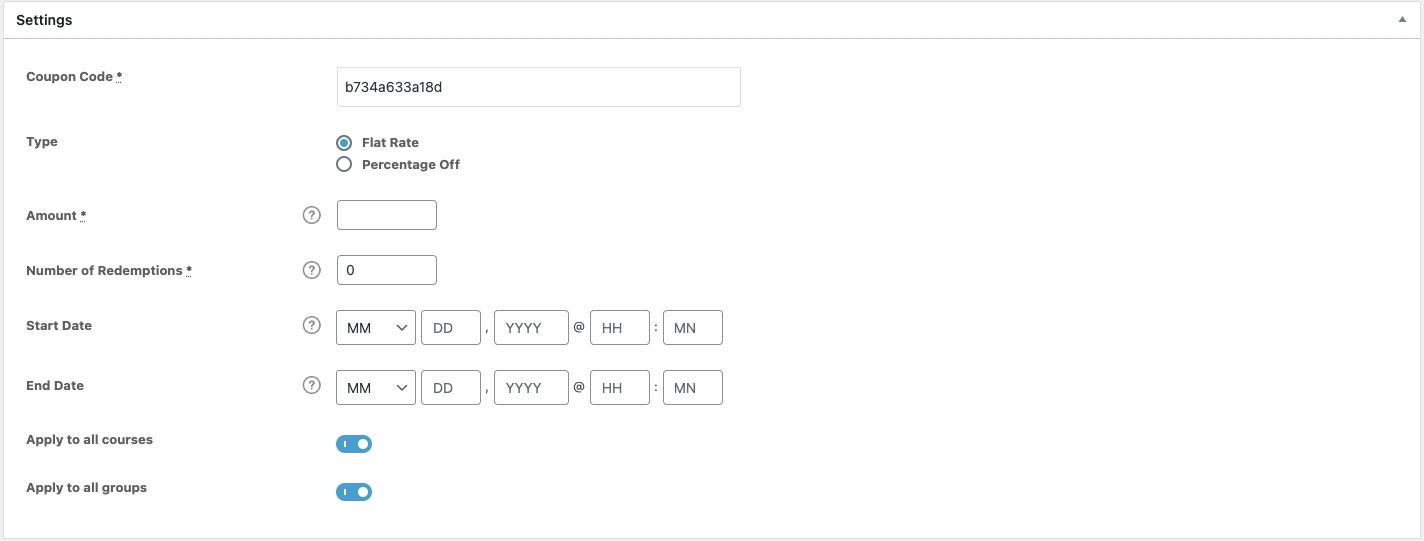
These settings can help you manage the way your coupons can be used, we’ll discuss the options below.
- Coupon Code – this is the actual Coupon Code that you can give out to your students when they are purchasing the course.
- Type – this is what the coupon will be when applied. You have two options:
- Flat Rate – deducts a flat rate to the actual course price
- Percentage Off – deducts a percentage off of the actual course price.
- Amount – is the actual amount of the coupon, this can either be the flat rate or the percentage off of the course price.
- Number of Redemptions – this refers to the number of times the coupon can be redeemed. Enter 0 for unlimited redemptions.
- Start Date – indicates the start date that the coupon can be used.
- End Date – indicates the expiry date of the coupon. After this date, the coupon can no longer be used.
- Apply to all Courses – indicates whether or not the coupon can be used and applied to all the courses. If this is turned off, you have to select the specific courses this coupon can be applied to.
- Apply to all Groups – indicates whether or not the coupon can be used and applied to all groups. If this is turned off, you have to select the specific groups this coupon can be applied to.
Once you’re done updating all the settings, click on the “Publish” to publish your coupon.
The User Experience
Logged-Out/New User
- Go to the course page of the course that you would like to take.
- Click “Take This Course”

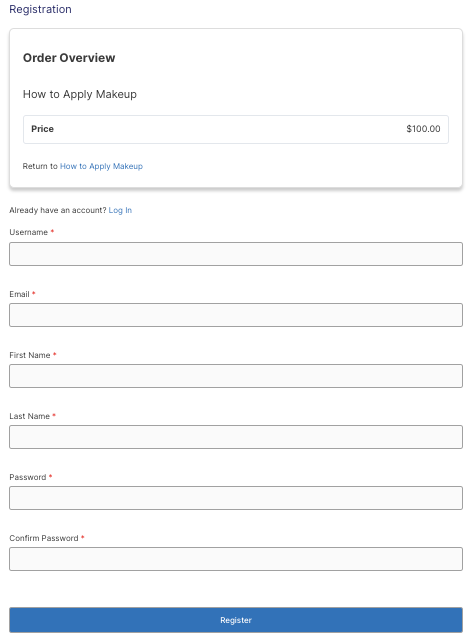
- You will then be redirected to the registration page where you will be asked to register an account. Fill out the information as needed.

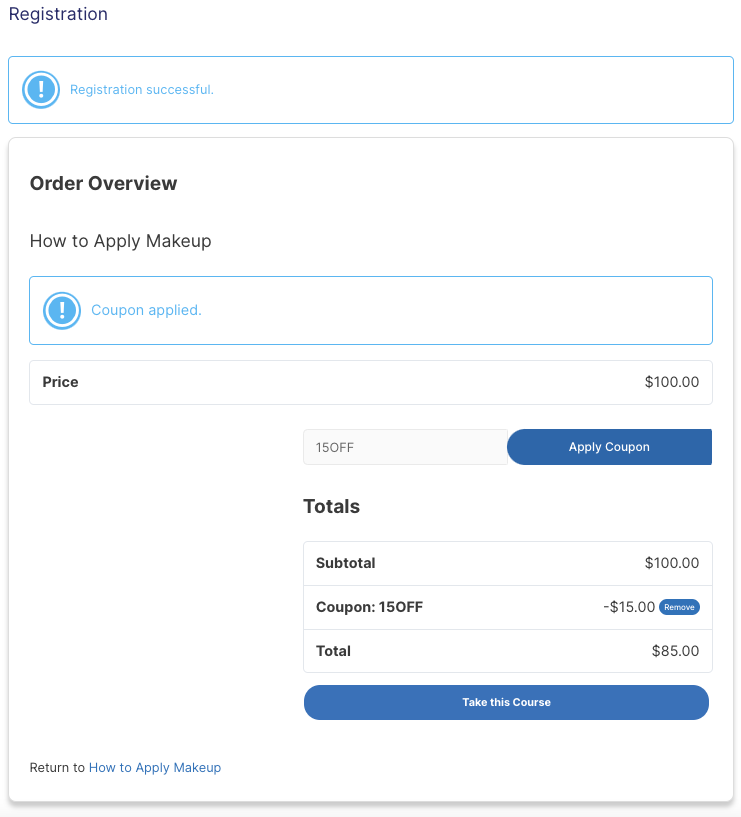
- Once the registration is successful, you will be redirected to the purchase page where you can apply the coupon.

- If the coupon is valid, the discount will be applied after clicking the “Apply Coupon” button.
- Click “Take this Course” to proceed to payment.
- Once the payment is done, you are now successfully registered to the site and enrolled to the course.
Logged-In/Existing User
- Go to the course page of the course the you would like to take.
- Click on “Login” next to the “Take this course” button.

- Login to the site using your existing logins.
- Once you’re logged in, Click “Take This Course”.
- You will be redirected to the purchase page where you can apply the coupon.

- Click the “Take this Course” button to proceed to payment.
- Once the payment is done, you are now enrolled to the course.

