
The LearnDash ThriveCart integration is one of several options for selling your courses. ThriveCart is a premium eCommerce solution that provides several payment options (one-time, subscriptions, trials), advanced analytics, cart abandonment recovery, A/B split testing, upsells, and more.
ThriveCart is a premium service, and at this time don’t offer a free trial. You can use this integration to sell courses on your LearnDash site.
NOTE
You need to sign up for a ThriveCart account before you can use this integration.
If you’re looking for a free and/or easier way to accept payments, consider our built-in PayPal integration or the free Stripe add-on.
Table of Contents
Who Should Use the ThriveCart Integration?
You should consider using the ThriveCart integration if:
✅ you want to use beautiful, pre-built checkout templates
✅ you have one, or only a few, courses to sell
✅ you’re looking for advanced analytics & other conversion-focused eCommerce features
You might not want to use the ThriveCart integration if:
❌ you’re selling a lot of courses (or other products)
❌ you want to closely manage the account creation & login process
❌ you’re on a tight budget
Sign Up for a ThriveCart Account
- Navigate to ThriveCart.com and follow the instructions for registering a new account
- Once your account is set up, you can navigate to your ThriveCart dashboard to access your account settings, as well as the information you’ll need to set up the LearnDash integration.
Install the ThriveCart Integration
Option 1: Add-ons Menu (requires an active LearnDash license)
- In your WordPress admin area, navigate to LEARNDASH LMS > ADD-ONS
- Locate the ThriveCart for LearnDash add-on
- Click Install Now
- Click the Activate Plugin button
Option 2: Manual Upload
- Download the plugin file (must be logged in to download)
- In WordPress, navigate to PLUGINS > ADD NEW
- Click Upload Plugin
- Browse for the
.zipfile you downloaded in Step 1 - Click Install Now
- Click Activate Plugin
Create a Product in ThriveCart
Before you can connect a LearnDash course, you’ll need to create a product in ThriveCart that you can connect it to.
- Navigate to ThriveCart.com and click the Log In button
- From your dashboard, click on Products
- Click the Create Product button
- Select Digital on the product type selection pop-up
- Click the Create New Product button
- Fill in your product details, clicking Next on each tab until all the necessary details are complete
- Click Save & Get URL to finish creating your product
For more information on creating your first product, check out ThriveCart’s getting started guide.
Create a Product in WordPress
Now that you have a product in ThriveCart, you’ll need to create a matching product in WordPress, and link it to a LearnDash course.
- Navigate to LEARNDASH LMS > THRIVECART
- Click Add New ThriveCart Product
Title
Enter a title for your product. In most cases, this should match the title for your LearnDash course.
Slug
The slug is a unique identifier for this product. It should match your product title, but…
- be all lowercase
- spaces should be replaced with hyphens
If your product title is My Awesome Course, your slug should be:
my-awesome-course
ThriveCart Product ID
You can locate your Product ID from the ThriveCart dashboard.
- Click on a product to edit it
- Look in the URL bar at the top of your browser window
- The product ID is the number located after
/products/
![]()
ThriveCart uses ascending product IDs. In general, if you have 1 product the product ID will be 1.
Associated Courses
Select the LearnDash courses that you’d like to link to this product. As soon as someone buys the product via ThriveCart, they will be automatically added to the course.
Hold down CTRL (CMD on Mac) to select multiple courses.
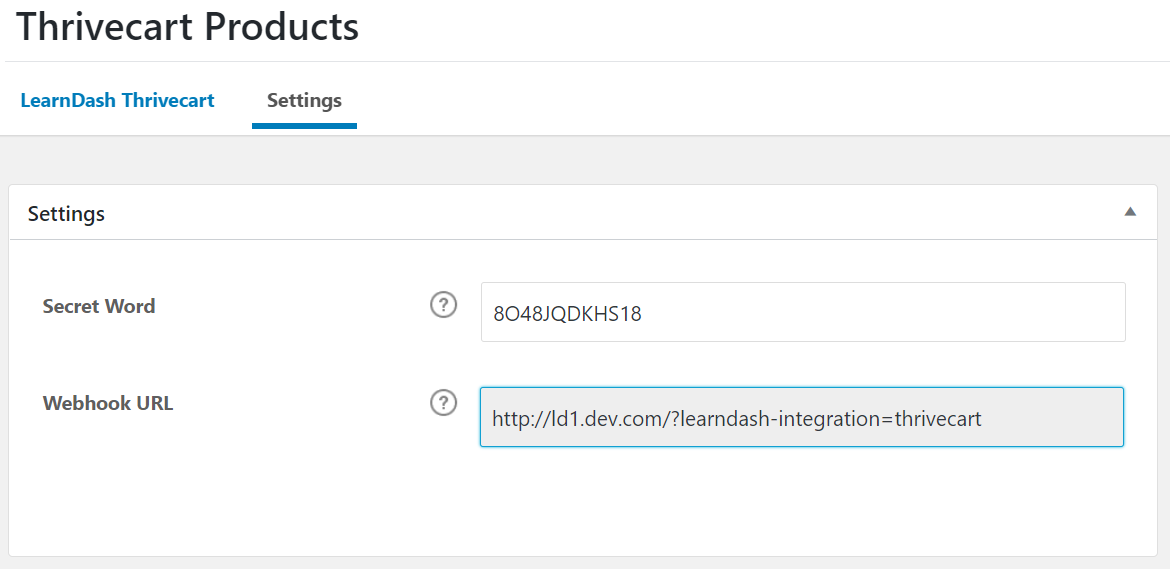
Webhook URL
The Webhook URL is automatically created for you, but you need to provide it to ThriveCart in order to complete the integration.
- Navigate to LEARNDASH LMS > THRIVECART
- Click on the Settings tab
- Copy the URL from the “Webhook URL” box
- Navigate to your ThriveCart dashboard
- Click on your Profile
- Click on Settings
- Click on API & Webhooks
- Click on Webhooks & Notifications
- Click on Add a Webhook
- Paste in your webhook URL into the box and save
Secret Word
The Secret Word is automatically generated by ThriveCart from your ThriveCart account. Having the correct Secret Word added to your LearnDash website will ensure that both platforms, ThriveCart and your website, can communicate securely and payments are well validated. Here is how you can set it up
- On your ThriveCart dashboard, navigate to SETTINGS > API & WEBHOOKS > THRIVECART ORDER VALIDATION
- Click on View Settings
- Copy the generated Secret Word

- Go back to your WordPress admin area
- Navigate to LEARNDASH LMS > THRIVECART
- Click on the Settings tab
- Paste your Secret Word on to the Secret Word field

If you’re having problems with the integration, you have the option to generate a new Secret Word from your ThriveCart settings page. Just make sure that you also update the Secret Word on your LearnDash ThriveCart Addon settings.
Course Configuration
After you’ve configured your ThriveCart for LearnDash settings, the final thing you need to do is set up your course to accept payments.
- In the WordPress admin area, navigate to LEARNDASH LMS > COURSES
- Click on the course you’d like to sell
- Click on Settings at the top
- Scroll down to Course Access Settings
- Set the “Access Mode” to Closed
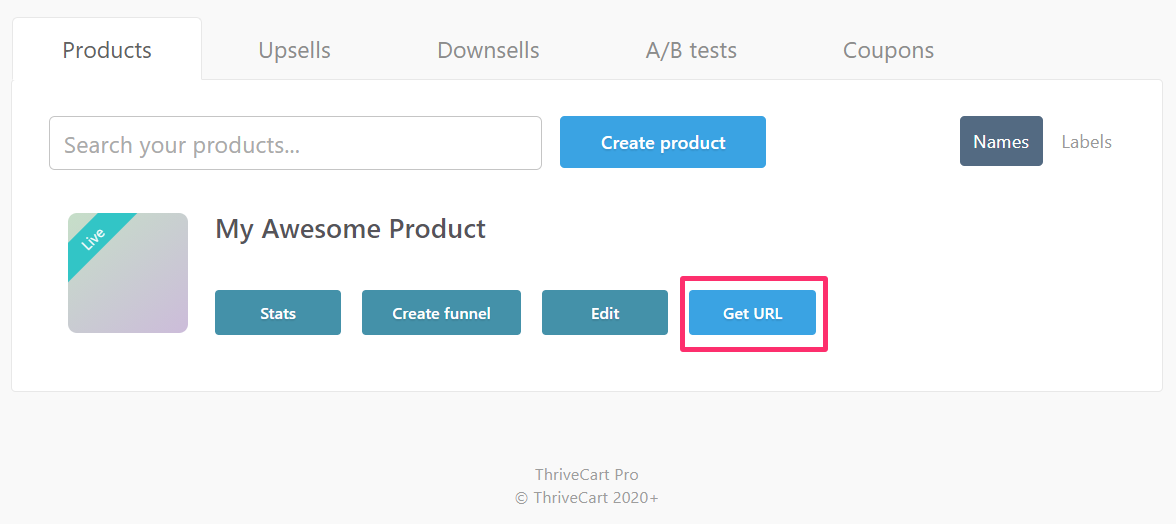
- Enter your ThriveCart product URL in the Button URL field
To locate your ThriveCart product URL, navigate to your Products page from your ThriveCart Dashboard, then, click the “Get URL” button next to the product that you created. It should automatically be copied to your clipboard, otherwise, copy the URL from the box that shows up on the page.
The User Experience
Now, when someone navigates to your course page and clicks the “Take this Course” button, they’ll be directed to ThriveCart to complete their purchase.
After payment is complete, a new user account is automatically created, and that user is enrolled into the course they just purchased.
COURSE REMOVAL
The ThriveCart integration will automatically remove users from a course if you refund their payment or their subscription is cancelled.
FAQ
Can I still use and set up “Bumps” and “Upsells”?
Yes, you can still add “Bumps” and “Upsells” to your products from your ThriveCart product set up. Since ThriveCart will handle the checkout process, any upsells or promotions that you associate with a product will be reflected when the user is redirected to the ThriveCart checkout page. You can learn more about setting up ThriveCart “Bumps” and “Upsells” on ThriveCart’s official support site.
On the LearnDash side, you have to create a new ThriveCart Product on the ThriveCart addon for every new Upsell or Bump that you associate with your main product. Under the ThriveCart Product ID field, you have to enter:
- For Bumps:
bump-main product number(Substitute your main product number with the real values, e.g.,bump-1) - For Upsells:
upsell-upsell product number(Substitute your Upsell number with the real values, e.g.,upsell-1. You can get this number from the URL of the Upsell on your ThriveCart Upsells Page.)
Why is it showing two transactions on my records?
For LearnDash 4.5.0 or newer, there will be 2 transaction record per single transaction. This is normal and your user will not be charged twice for each transaction. See our explanation on this on our Payment Transaction Records documentation.