
LearnDash’s Elementor addon allows you to use the powerful editing capabilities of Elementor to let you build your course exactly how you want it. To help you get your courses up and running efficiently, we suggest following the recommendations below.
Note: In order for Elementor and LearnDash to work together, you need the following:
- LearnDash LMS
- LearnDash Elementor Addon
- Elementor
- Elementor Pro
LearnDash and the LearnDash Elementor addon can be downloaded from account.learndash.com while Elementor and Elementor Pro can be acquired from https://elementor.com
Table of Contents
Installation
If you have your active license configured within your LearnDash install already, you can find the LearnDash Elementor Addon available in LearnDash LMS > Addons
If you have not activated your license inside of your LearnDash install, you can visit https://account.learndash.com/plugins and download the addon from there.
Setup
- Navigate to Elementor > Settings in your WP admin dashboard.
- Ensure you are on the General tab and look for the Post Types section;
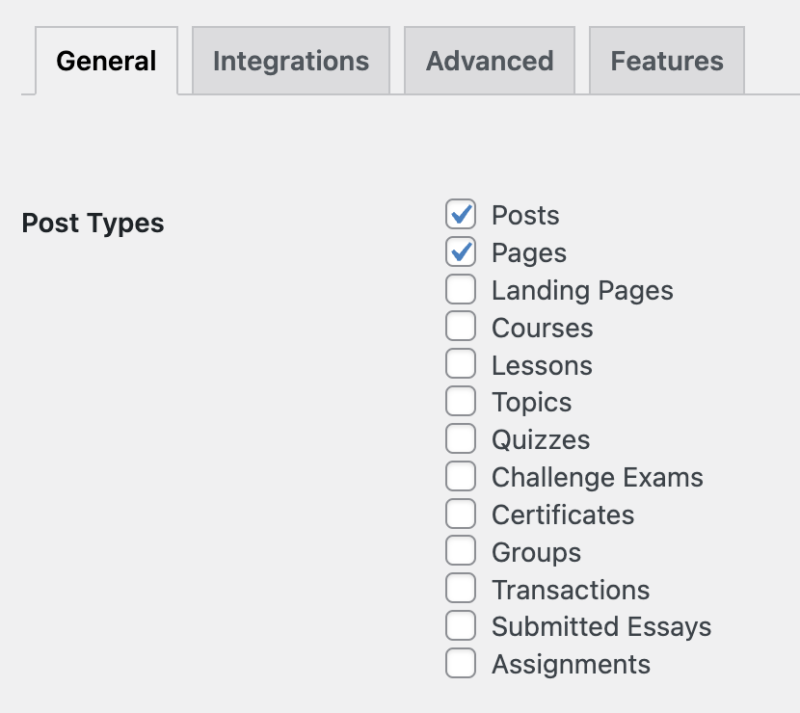
You may see more Post Types available than what is shown above, but for this guide you’ll want to make sure that you see at least the following options:
- Courses
- Lessons
- Topics
- Quizzes
Make sure that at least those 4 are unchecked and scroll down and click on the Save Changes button.
Template Configuration
For the purpose of this guide, you’ll want to ensure you are using the latest version of Elementor’s theme builder. Navigate to Elementor > Settings in the admin menu and click on the Features tab at the top.
While the LearnDash Elementor Addon will try to automatically insert the relevant widgets to your content, if you want full control over where exactly the widgets appear you’ll want to enable the Disable Widget Auto Insertion setting.
Disable Widget Auto Insertion
This setting can be found under LearnDash LMS > Elementor
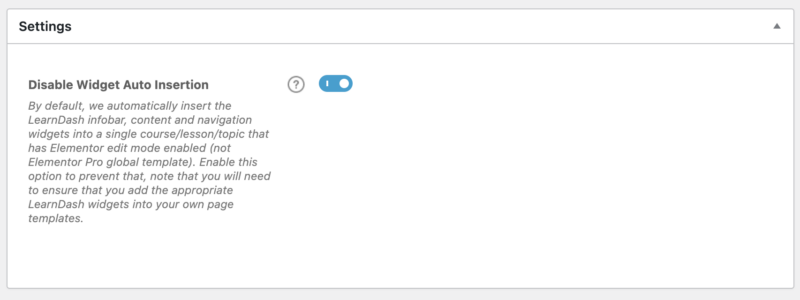
As mentioned in the help text of this feature, once this setting is enabled and a widget is not already inserted into a template, that widget will no longer show on the template when viewing on the front end of your site.
Template and Widget Setup
Go down the list of features and in the Stable Features section, ensure that “Default to New Theme Builder” is either set to Default or Active. If not, set to either of those and click on Save Changes at the bottom.
Next, navigate to Templates > Theme Builder in the admin menu. You should be presented with a screen similar to the following with a navigation menu on the left hand side as well
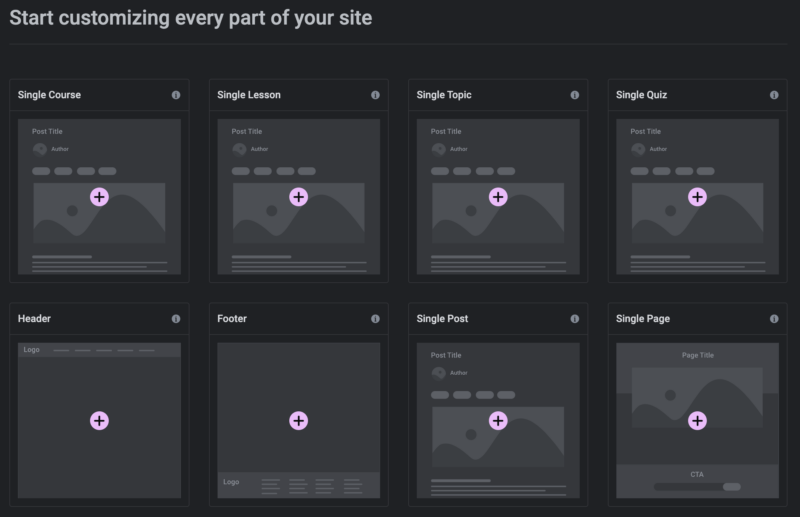
Click on the + icon on the Single Course template. A Library window should appear giving you the option to choose between Blocks, Pages and My Templates. Instead of using these, we will be making our own so you can close out this popup window.
You should now be presented with the template editor part of Elementor where we will add the widgets into the course template to display the data.
Inside of the Elementor sidebar on the left hand side, you should see a listing of widgets

In order to have the content displayed properly for a course we will need to add the following widgets into the course template:
- Post Title
- Course Infobar
- Course Certificate
- Post Content
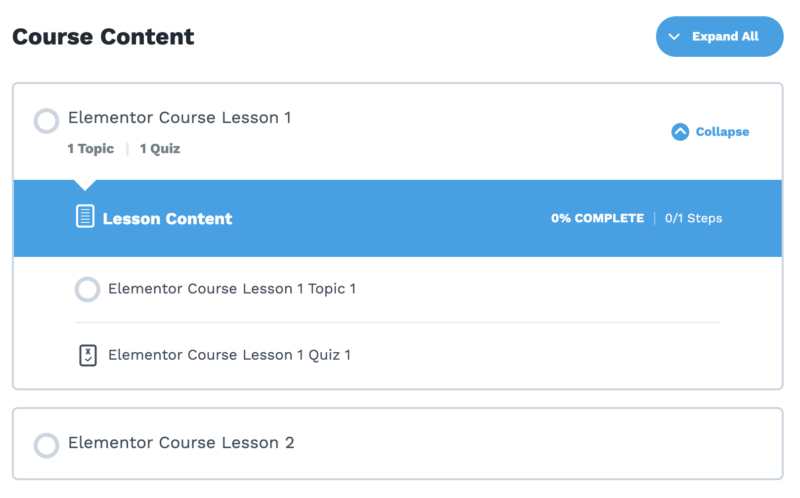
- Course Content
You can use the search bar at the top of the Elementor sidebar to find the widgets or expand/collapse each category section to find the appropriate widget. In a standard course layout, you’ll want to drag/drop the widgets from the sidebar into the editing area of your theme in the order listed above.
Each of the above widgets add important data for your course and are explained in more detail below. At this point, please navigate back to your WP admin dashboard and visit LearnDash LMS > Courses and click on Add New at the top right.
Post Title – This is the title of the course that you set inside of the WP editor
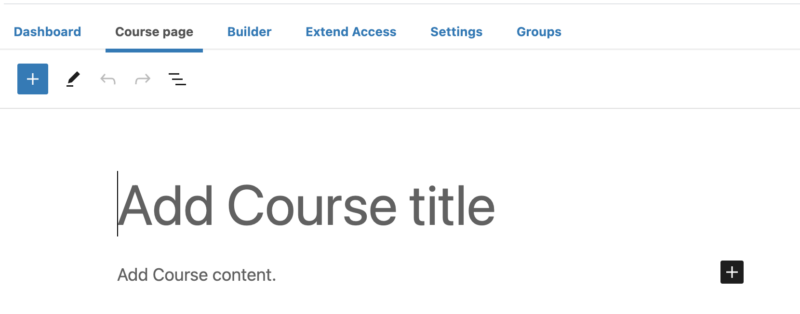
Add your course title to the ‘Add Course title’ area above.
Course Infobar – This is a set of data that LearnDash provides for users to understand their progress within a course. It is not controlled inside of the WP editor and is instead dynamically populated based upon the user’s enrollment and progress within a course.

Course Certificate – If you have a certificate configured for users that complete your course, this is where that data will be displayed for the user to view their earned certificate.

Post Content – This is the content section of the course that your students will read and use to gain knowledge. In the above screenshot, this is handled in the ‘Add Course content’ section of the WP editor.
Course Content – This is the section of content that LearnDash provides based upon the lessons, topics and sections that are created inside of the course builder under the Builder tab shown in the screenshot above.
More information about creating lessons, topics and quizzes for your course inside of the builder can be found in our course builder support article.
If you are having issues properly ordering the widgets inside of the theme area, you can click on the Navigator icon in the Elementor sidebar ( https://elementor.com/help/navigator/ ). This will give you a popup modal that can make it easier to order the widgets in the suggested order listed above.
Publishing Your Template
Once you have your widgets and course content configured, you can publish your template configuration inside of Elementor. At the bottom of the Elementor sidebar, click the Publish button. You should be presented with a popup window labeled Publish Settings where it asks “Where Do You Want to Display Your Template?”
This is where we will assign the template we have created to our LearnDash courses.
- Click on the Add Condition button
- Select the Courses option in the dropdown menu if it is not already selected
- Click the Save & Close button
Frequently Asked Questions
My content is no longer showing, what do I do?
This is usually due to your configured template not properly containing the associated Elementor widgets. While the plugin itself will try to include the widget automatically, you may see an issue where this doesn’t happen.
If that is the case, please see the Template Configuration section above on how to add the appropriate widgets into your template.
My LearnDash content is duplicated, what do I do?
In this case, you’ll want to try enabling the Disable Widget Auto Insertion setting mentioned above.
Can I customize the look of each course/lesson/topic/quiz?
Yes, however the purpose of the templates is to use them globally across all of the different post types.
While you can set templates per post type ( course / lesson/ topic / quiz ) it is not recommended. In the event that you want to make a change to all of your courses, you would need to go into each course and make the change instead of a single change that would span across all courses.
That said, if you would prefer to customize the look of each post type, you can follow the instructions below.
To accomplish this, in your WP admin dashboard…
- Go to Elementor > Settings
- Ensure you are in the General tab and look for the Post Types section
- Click the checkbox next to the post types that you want to create custom templates for
- Click on Save Changes.
Create a new course/lesson/topic/quiz like you would normally and when inside of the WP editor, click on the “Edit with Elementor” button. You would then follow the same process as described above in creating a general template for all courses but in this case it would create a template specific to that piece of content.
This allows you to have a different look between 2 different courses or have the same look between the course pages but a different look when viewing the steps ( lessons, topics and quizzes ) inside of a course.