
Table of Contents
Virtual Instructors
The Virtual Instructors feature helps you create an AI-powered virtual assistant that can answer questions asked by learners while progressing through the course. Virtual Instructors can share the workload of real-life teachers by responding to common questions, allowing teachers to focus their energy on creating more complex training material.
Please note that we currently do not use contextual AI for Virtual Instructors. This means the virtual assistant works like a real-life classroom teaching assistant who does not have the surrounding context of questions put to them. Off-topic questions can be answered, but you can restrict the tool from answering certain questions based on a list of banned words.
Note: You may need to include various forms of a banned word. For example, if your banned list includes the word “potato” in all lowercase, your learner may still work around the banned list by using “p0t@t0” and substituting numbers or signs for letters. You’ll want to include a variety of forms of your banned word including using numbers or signs in place of letters, such as in “pot@to”.
Setting up Virtual Instructors
Virtual Instructors is an experimental feature. To enable Virtual Instructors, go to LearnDash LMS > Settings > Experiments and toggle on the switch to enable this feature.
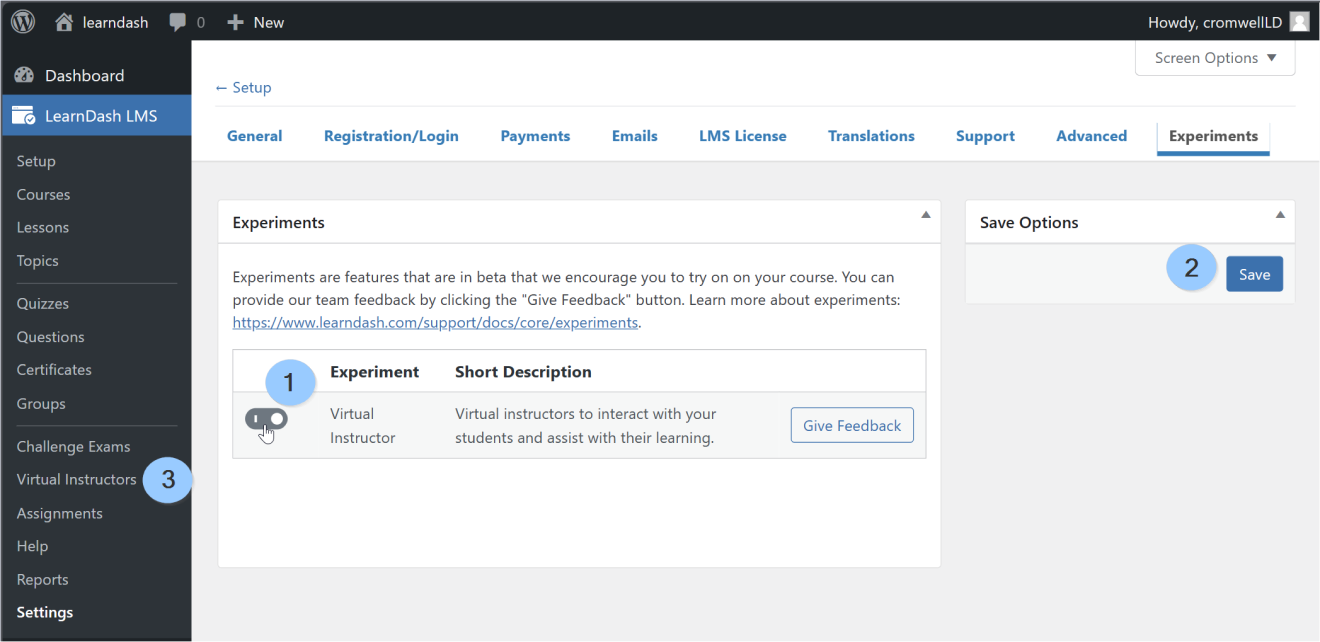
- Click the toggle to enable Virtual Instructors
- Click on Save to save your changes
- Once enabled, you’ll see the Virtual Instructors menu item under LearnDashLMS
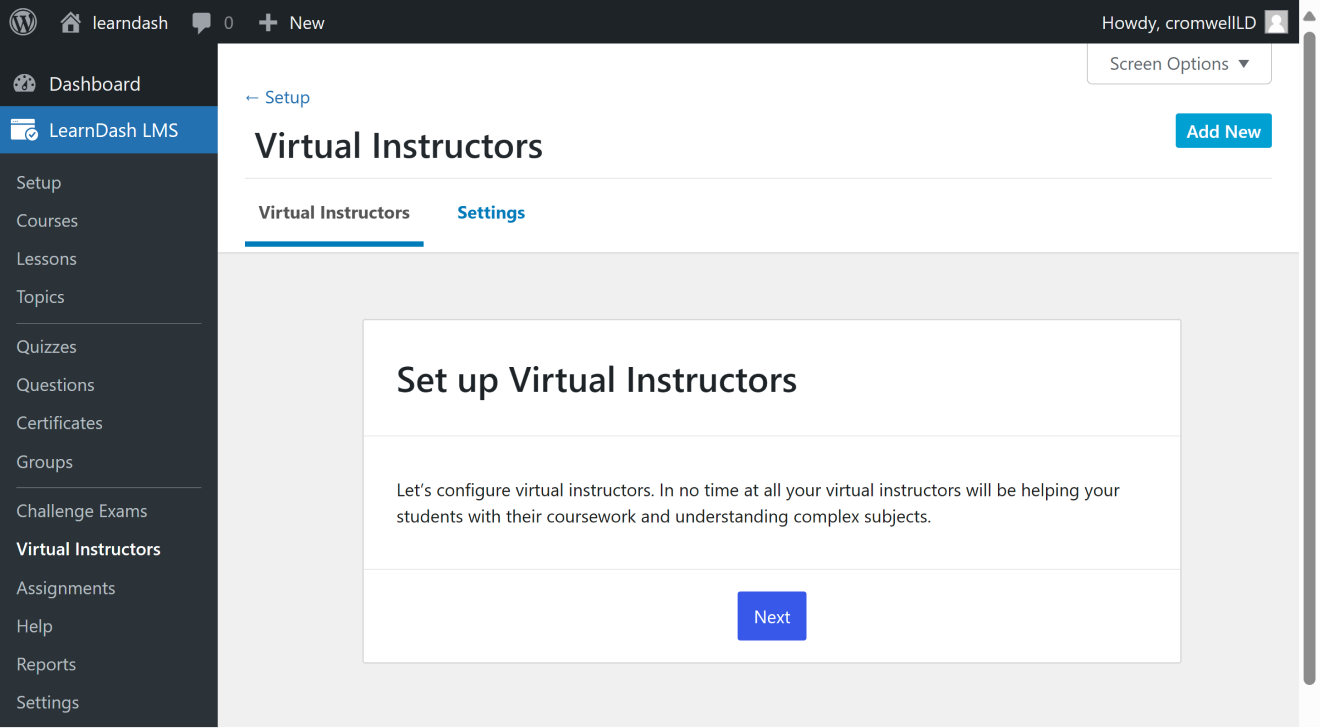
Once enabled, a new menu item LearnDash LMS > Virtual Instructors, will be added to the admin menu.

Global Configuration
Before you start setting up virtual instructors, go to LearnDash LMS > Virtual Instructors and click Next to save a few global settings:
On the next screen, you will be prompted to enter your OpenAI key:

Creating an OpenAI API key
Please follow these steps to create an OpenAI API key:
- Visit the OpenAI site at the following link and log in to your account or sign up for a new one: https://platform.openai.com
- Visit the pricing page to confirm which plan you need: https://openai.com/pricing.
We recommend gpt-3.5-turbo. - Go to the billing section and add a credit balance based on the subscription plan you choose: https://platform.openai.com/account/billing/overview
You can choose to switch on/off auto-recharge for your account, set up a payment method, and save other relevant billing-related information. - Next, go to https://platform.openai.com/api-keys and create a secret key to connect your site to OpenAI’s services.
Copy over the secret key and save it in the field highlighted in the screenshot above on your site. The OpenAI API key can be later updated on your site from LearnDash LMS > Settings > Advanced > AI Integrations.
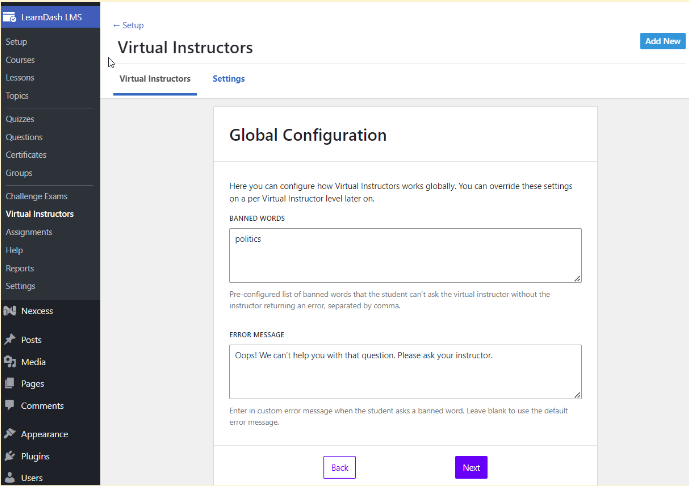
Save the global configuration, and then you are ready to add a list of comma-separated banned words and the error message that should be shown to users who try to use them.
The Objective of Setting Banned Words
Due to the wide range of subjects taught and age groups that learners belong to, the banned words list will help site admins protect users from inappropriate content or exclude off-topic questions from being asked. The global banned list can be overridden at the individual Virtual Instructor level. This will allow you to include more flexibility in the feature.
Setting up Banned Words
To set up a banned words list, go to LearnDash LMS > Virtual Instructors > Settings. The words added in the field provided should be comma-separated. Below the banned words, field, add the error message that should be displayed to users if they enter any of the banned words in their questions. The default message is “Oops! We can’t help you with that question. Please ask your instructor”.
Adding/Modifying Virtual Instructors
After the global settings have been added, go to LearnDash LMS > Virtual Instructors to add your first virtual instructor.
Individual Virtual Instructor Settings
- Navigate to LearnDash LMS > Virtual Instructors
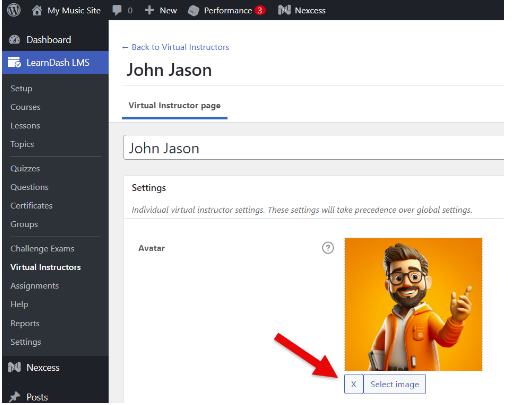
- Click Edit against the Virtual Instructor you want to modify, or click the Add New button to add a new Virtual Instructor.
- Click Select Image to choose an avatar for the Virtual Instructor.
Add custom instructions in the field provided. For example, you could request answers to use only short sentences for easy grasp. This will not be displayed to students taking the course, it is instructions for the virtual instructor itself ( OpenAI ) in how to respond to questions given to it.
For example, we’ll use the following instruction text “Don’t give direct answers, instead provide a clue”
When a students asks: What is 2+2?
The virtual instructor responds with the following: “To find the sum of 2+2, you can combine two groups of 2 items each. Think about how you can represent this visually to arrive at the answer.”
Without the instruction text, a virtual instructor responds with: “2 + 2 equals 4.”

Next, choose whether you want to associate this Virtual Instructor for all Courses or just a set of Courses by toggling the switch provided. If it should be a set of Courses, type in the Course names in the Associated Courses field and press Enter for each Course.

Next, follow the same steps for associated Groups using the toggle switch and field provided:
Next, follow the same steps for associated Groups using the toggle switch and field provided:

You can choose to override the global list of banned words by adding a specific list for each Virtual Instructor using the relevant fields.

Finally, add a custom error message to override the globally set message for questions that include banned words.

If you have caching enabled, click Purge from cache in the Publish box before clicking Publish or Update.

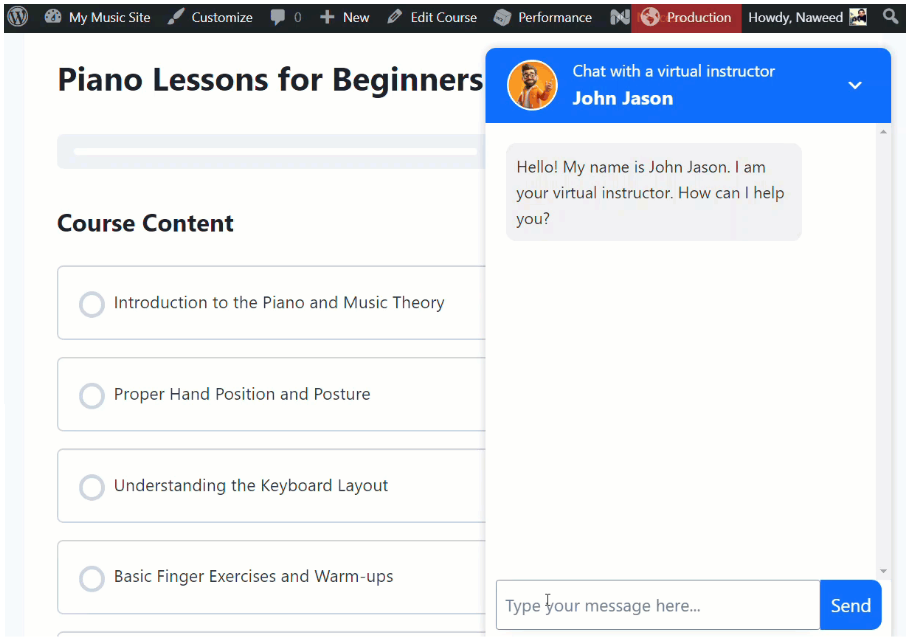
Using a Virtual Instructor in a Course
The virtual instructor linked to Courses and Groups will appear on the front-end in the bottom right corner of the content pages. Learners can ask questions related to the Lesson or Topic content while they study it.
If the learner asks a question based on a banned word, the error message you set will be displayed.

Frequently Asked Questions
Q: A message says, “Error: You didn’t provide an API key.” What am I missing?
A: Your OpenAI API key may be invalid or expired. Please visit https://platform.openai.com/api-keys to create a new key or add adequate credits to your account to ensure you can use their service. Please refer to the section Creating an OpenAI API key to know more.
Q: Can the instructor or admin view the questions asked by the students/users?
A: No.
Q: Is Virtual Instructors free?
A: No, while the code itself is free and open source, as it uses OpenAI to process the questions, you need to add credits to your OpenAI account for it to work. Please refer to the section Creating an OpenAI API key to know more.
Q: Can the instructor or admin view the questions asked by the students/users
A: No, the OpenAI account owner who sets the key can see the number of tokens ( responses sent by the VI ) but cannot see the questions being asked nor the answers being given.
Q: If a course belongs to more than one virtual instructor’s associated courses/groups, which virtual instructor setting will be used?
A: Here is the list of priority of the order:
- Specific course setting
- Specific group setting
- Global group setting (Applied to all groups)
- Global course setting (Applied to all courses)
If a priority level has more than one virtual instructor, it will use the most recent one.
Q: Can I use multiple different OpenAI keys across instructors?
A: No, currently we only support a single OpenAI key being used across all created instructors on a single site.