
NOTE
The new registration process comes with LearnDash version 3.6.0. Please update to the latest version of LearnDash to use the new Registration feature.
NOTE
This feature works with the new LearnDash 3.0 template. This feature does not work with the Legacy template.
The new LearnDash registration process enables you to easily manage and set up your user registration just like other e-Commerce platforms. You can easily manage your form fields and registration pages right from your LearnDash Settings. Your users can also easily register just by entering their information on the form and even set their passwords directly on the registration page. If the user already has an account, they can also easily log-in and even reset their password from the registration form.
To enable the new registration process, you have to fill out the “Registration”, “Registration Success”, and “Reset Password” pages from the Registration tab in the LearnDash settings. Follow the steps below to learn how. If these settings are left empty the old registration process will remain in effect.
Table of Contents
Getting Started
To get started with setting up the new LearnDash Registration process, first we have to make sure that a couple of settings are enabled.
✅ Make sure you’re on LearnDash 3.6.0 or later
To verify your LearnDash version:
- From your WordPress Admin Dashboard, go to Plugins > Installed Plugins
- Look for “LearnDash LMS”
- You can see the version number right below the description.
- If needed, follow this guide to update your LearnDash version.
✅ Make sure that you’re using the LearnDash 3.0 Template
- Navigate to LEARNDASH LMS > Settings
- Click on the General tab
- Select “LearnDash 3.0” in the Active Template option
✅ Make sure that you have “Login and Registration” for LearnDash 3.0 turned on
- Navigate to LEARNDASH LMS > Settings
- Click on the General tab
- Toggle on the option for Login & Registration
✅ Make sure you have registration turned on for your WordPress site
- From your WordPress Admin Dashboard, go to Settings > General
- Scroll down to where it says Membership
- Check the box next to it that says “Anyone can register”.
Creating the Registration Page
Now that we have all the settings ready and turned on, we can now start working on the actual registration process.
Similar to the process with other e-Commerce platforms, we first have to create a “Registration” page. If you don’t already have a registration page, follow the steps below to create one.
- From your WordPress Admin Dashboard go to Pages > Add New
- Add a title to the page. Any title will do, but it’s best if you name it “Registration” or something related to avoid confusion.
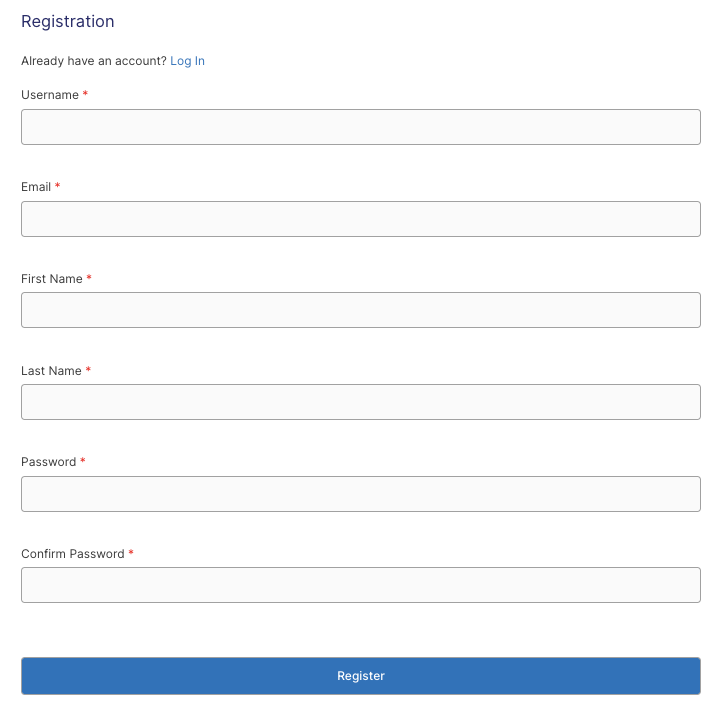
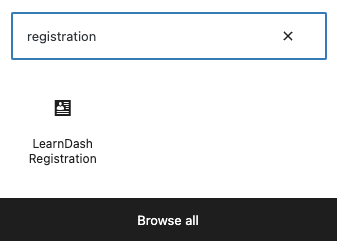
- Add the LearnDash Registration block to the page.
- Alternatively, you can also use the shortcode [ld_registration]. You can also add optional attributes such as width.
- At this point, you can add other elements and assets that you want on the page.
- Publish the page
Setting Up The Registration Fields
Now that we’re done creating the registration page, it’s now time to edit and arrange our registration fields:
- Navigate to LEARNDASH LMS > Settings
- Click on the Registration tab
From here, you can update the settings to fit your preference:
- Enabled – Toggle whether or not to show the field on your registration form.
- Required – Check whether or not to indicate the field as required, i.e., the form cannot be submitted without them being filled out.
- Label – Change how each field is labelled in the registration form.
You can also rearrange the fields to your liking by clicking and dragging the handle on the left-hand side of each field.

As opposed to the old registration process, the users will now have the opportunity to set their passwords right from the registration page, instead of clicking on a separate link on their email.
Setting Up the “Reset Password” Page
You would also want to set up your reset password page for your users to easily reset their passwords if they forget or lose their passwords. To create this page simply follow the steps below:
- From your WordPress Admin Dashboard go to Pages > Add New
- Add a title to the page. Any title will do, but it’s best if you name it “Reset Password” or something related to avoid confusion.
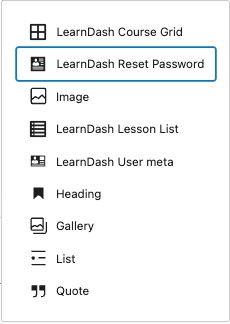
- Add the LearnDash Reset Password block to the page.
- Alternatively, you can also use the shortcode
[ld_reset_password]. You can also add optional attributes such as width. - At this point, you can add other elements and assets that you want on the page.
- Publish the page
If you’ve gone through the OnBoarding Wizard, this page will have been automatically created and set in the following settings.
Setting Up the Registration Pages
The final step of the process also finalizes and enables the new registration flow. Whether or not these settings are filled out determines if your site will use the old or new registration process.
- Navigate to LEARNDASH LMS > Settings
- Click on the Registration tab
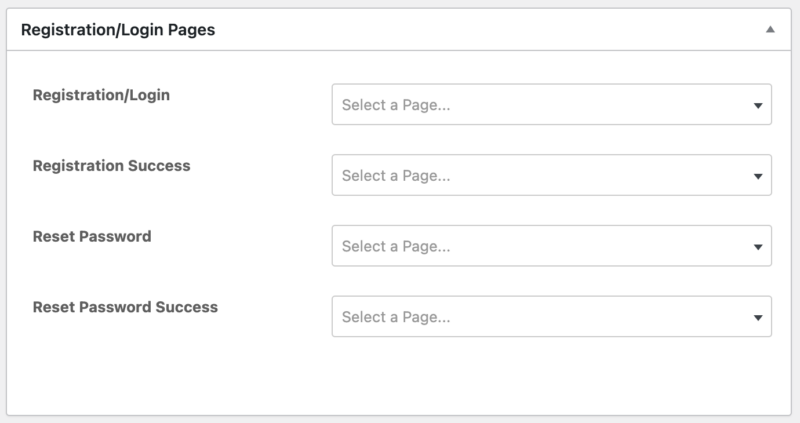
From here you can set the following pages:
- Registration – this is the page that we made earlier in this tutorial. Once the page is selected from the dropdown, the users will be automatically redirected to this new registration page after clicking the “register” link.
- Registration Success – this is where users will be redirected after successful registration. This can be any page that you like and created beforehand. This can be a “Thank you” page, the “All Courses” page, or even to your shop page. After successful registration, all users will be automatically logged in by default.
- Reset Password – this is the page that we made earlier for resetting the user’s password. Select the page from the drop-down menu. Once it is selected, the users will be automatically redirected to this “Reset Password” page if they click on the “Forgot your password” link in the log in form. If you went through the OnBoarding Wizard, this page will be automatically populated.
- Reset Password Success – this is the page users will be redirected to after they have successfully reset their password
The New Registration Flow for Free Courses
Once the new registration process is set up, courses with access settings set as “Free” will show a “Login to Enroll” button on the course page. Here’s what it will look like:
- Once your user clicks on the course, they will be taken to its corresponding course page
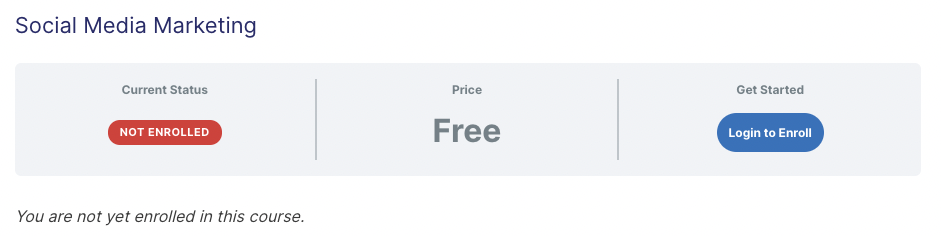
- If they are logged out, they will see the “Login to Enroll” button. If they are logged in, they will see a “Take this course” button under “Get Started”.
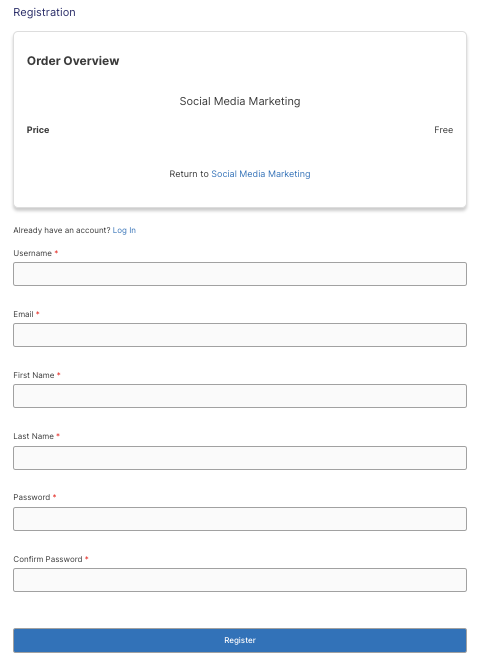
- Whether your user is logged in or not, if they click on the buttons, they will see a popup that will ask them to either login or register. If they are already a user in the site, they simply need to log in to be able to access the course.
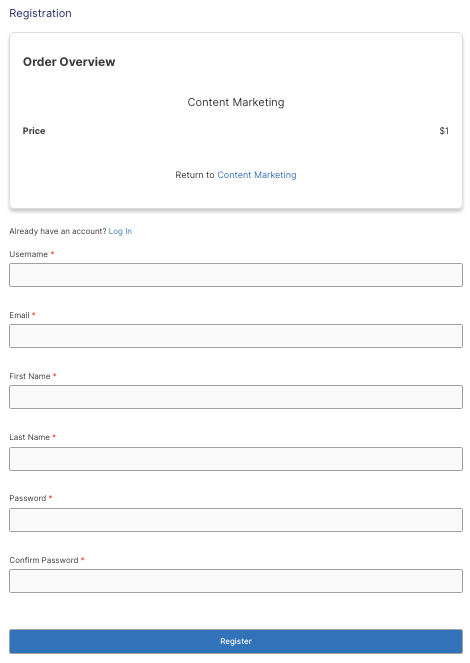
- If they click on the “Register an Account” button, they will be taken to the new registration page that you created with the Order Overview at the top. If they are already a user and would like to log in instead, they can click on the “Log in” button at the top.
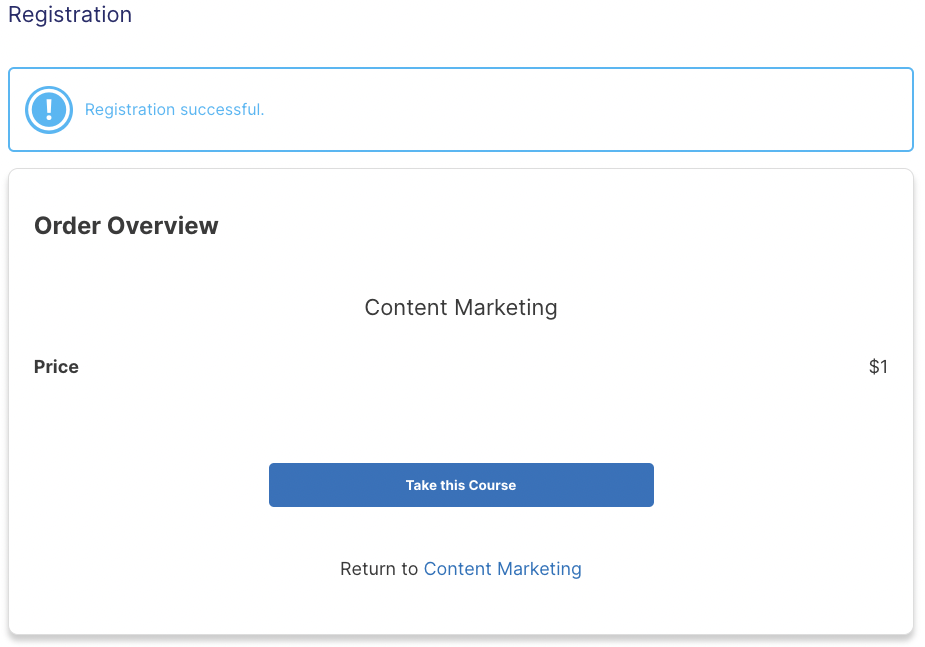
- After successful registration, your users will be taken to a success page where they will see a button that says “Take this Course”. They will also be automatically logged in at this point.

- Once they click the “Take this Course” button, they will then be redirected to the course page indicating that they have been successfully enrolled in the course.

The New Registration Flow for Paid Courses
Visitors viewing a course with access mode set to “Buy Now” or “Recurring” will see a login link in the “Take this Course” section. If the user has already purchased & enrolled into the course, they can use the “Login” link to open the registration form & sign into their account. If not, they can click the “Take this Course” button to go through the new registration flow.
Here’s what it will look like:
- Once your user clicks on the course, they will be taken to its corresponding course page
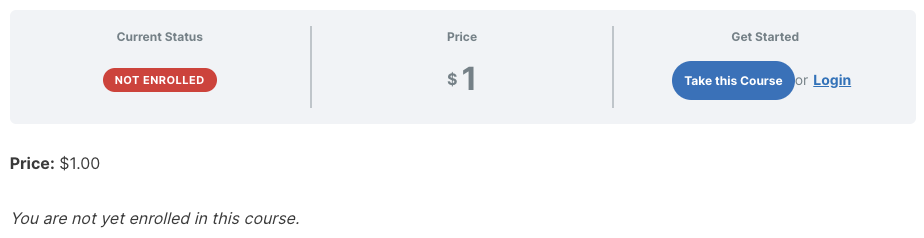
- If they are an existing user, they simply need to click the “Login” link to open the form and login to their account. They can then purchase the course using the set payment gateway.
- If they are a new user, the can click the “Take this Course” button to be taken to the registration page with an Order Overview at the top. If they are already a user and would like to log in instead, they can click on the “Log in” button at the top.
- After successful registration, they will be directed to a success page with a button to “Take this Course”. They will also be automatically logged in at this point.
- After clicking “Take this Course”, the user will then be redirected to the selected payment gateway to process the payment for the course. To learn more about our built in PayPal/Stripe integration and other payment gateway, check out our documentation here.
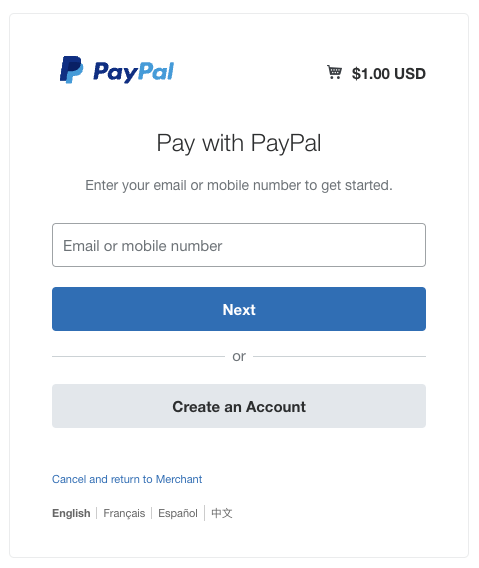
- Upon successful payment, the user will be redirected back to the course page indicating that they have successfully enrolled in the course.

NOTE
To learn more about Course Access settings and how to set them up, click here.
Reverting to the Old Registration Process
To revert back to the old registration process:
- Navigate to LEARNDASH LMS > Settings
- Click on the Registration tab
- Scroll down to “Registration Pages” section
- Click on the “x” next to the name of the pages on the drop down for both the “Registration”, “Registration Success” and “Reset Password” pages.