
The LearnDash Group settings screen is where you can set global options that will apply to all LearnDash Groups that you create. Please note that individual groups cannot have their own unique settings.
To access your global group settings:
- In the WordPress admin area, navigate to LEARNDASH LMS > GROUPS
- Click the Settings tab
Table of Contents
Group Leader User Settings
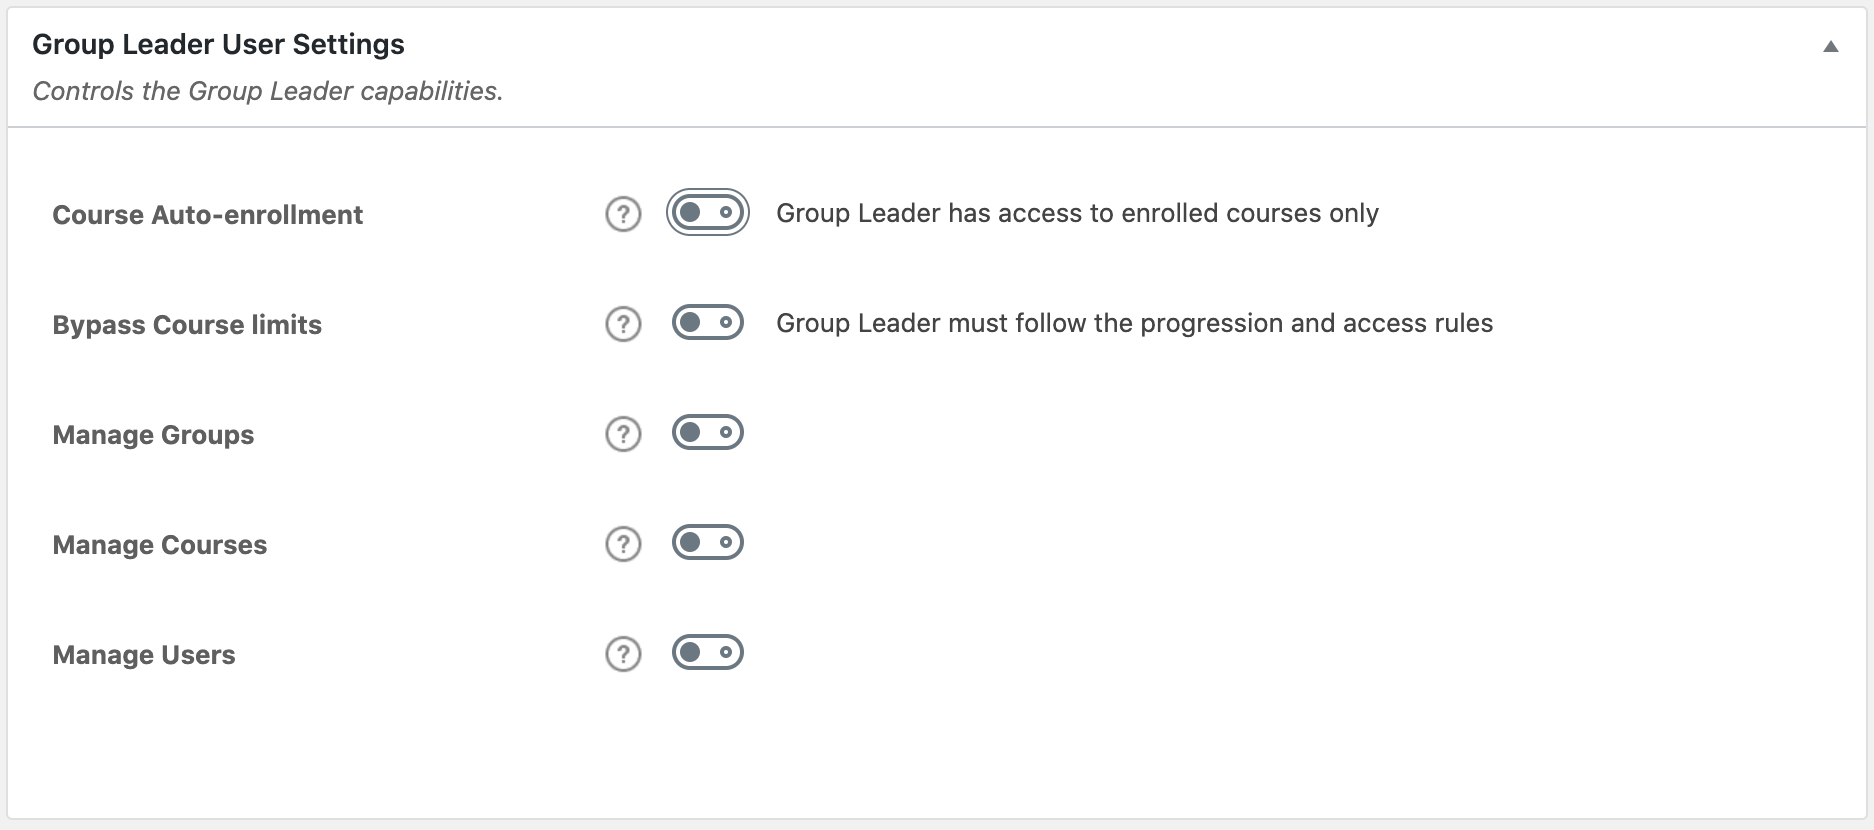
These settings are optional and apply to the Group Leader user role only. These settings allow for customizing the Group Leader’s capabilities in the following ways:
- Course Auto-enrollment: Enable this setting to give Group Leaders access to all courses automatically. Turn this setting off if you prefer to require Group Leaders to enroll into the course/s (just like regular users).
- Bypass Course limits: Enable this setting to allow Group Leaders to access course content in any order, and bypass all progression and/or access limitations that are set for the course. Turn this setting off to force Group Leaders to navigate through course content in the same way as students.
- Manage Groups: Enable this setting to grant Group Leaders the ability to create and manage groups. This includes adding and removing courses, users and other content in the group.
- Manage Courses: Enable this setting to grant Group Leaders the ability to create and manage courses. This includes creating and deleting course content, enrolling users into courses, etc.
- Manager Users: Enable this setting to grant Group Leaders the ability to manage users. This includes accessing the user profiles to add or remove progress, manage specific user access, creating and deleting users, etc.
NOTE
Each Manage option offers two levels of capabilities: Basic and Advanced. Basic capabilities mean that the Group Leader is limited only to his or her own groups, users, and courses they are authors of. Advanced capabilities mean that the Group Leader can interact with ALL groups, courses and users on the site. Read more about the specific capabilities here.
Global Course Management & Display Settings
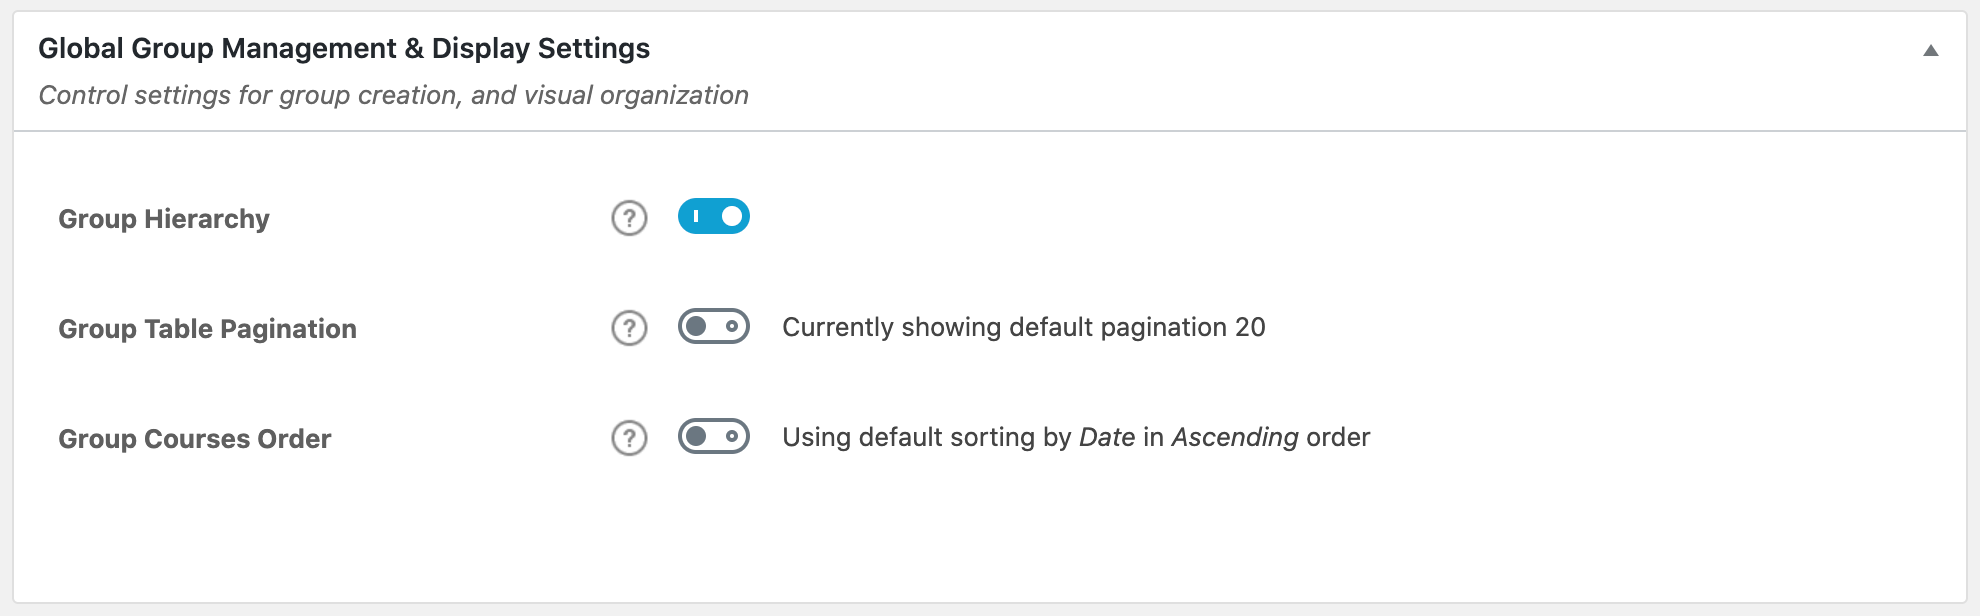
These settings are optional and will impact the front-end display as well as group structure.
- Group Hierarchy is fully optional. Enabling this setting will grant you the ability to nest groups within other groups. Any user enrolled into a parent group, will automatically have access to (and be added to) all its child groups. Parent groups can be selected on the Group Page’s Attribute section.
- Group Table Pagination allows you to control how many courses are displayed per page on the group description page’s content table.
- Group Course Order allows you to control the display order of the courses on the group description page’s content table.
Group Custom Post Type Options
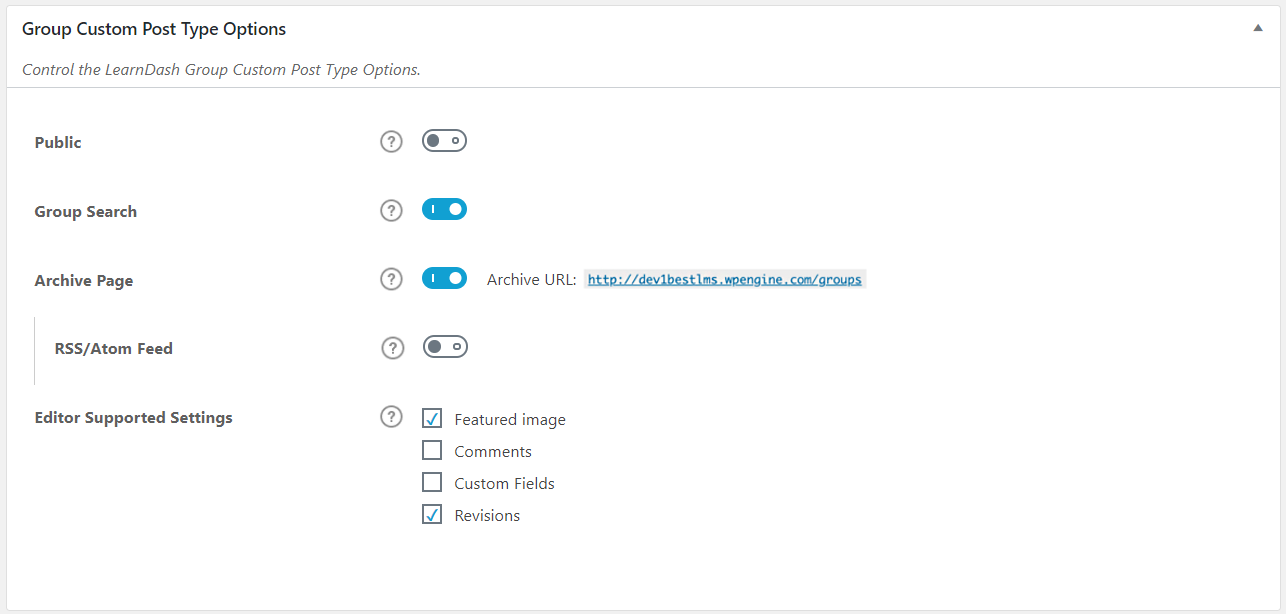
These options will apply globally to all LearnDash Groups on your site:
- Public: Enable this setting if you want your groups to be public and visible on the front-end. This also allows you to edit or update your Group URL or permalink from the Group Page.
- Group Search: Enable this setting if you want groups to be included in search results when using the default WordPress search form on the front-end of your site.
NOTE
Group Search has nothing to do with Google search results. This setting only applies when using the built-in WordPress search form on your website.
- Archive Page: Enable this setting if you want visitors to be able to access the default group archive page. When enabled, a preview of the URL is displayed. Note: The design of this page is controlled by your theme, not by LearnDash.
NOTE
You need to re-save your permalinks after updating this setting. You can set the permalink URL for this page from your WordPress permalinks settings.
- RSS/Atom Feed: Enable this setting if you want to include LearnDash Groups in the RSS feed of your site.
- Editor Supported Settings: You can choose which features of WordPress you’d like to enable for the Group post type.
- Featured Image
- Comments
- Custom Fields
- Revisions
Group Taxonomies
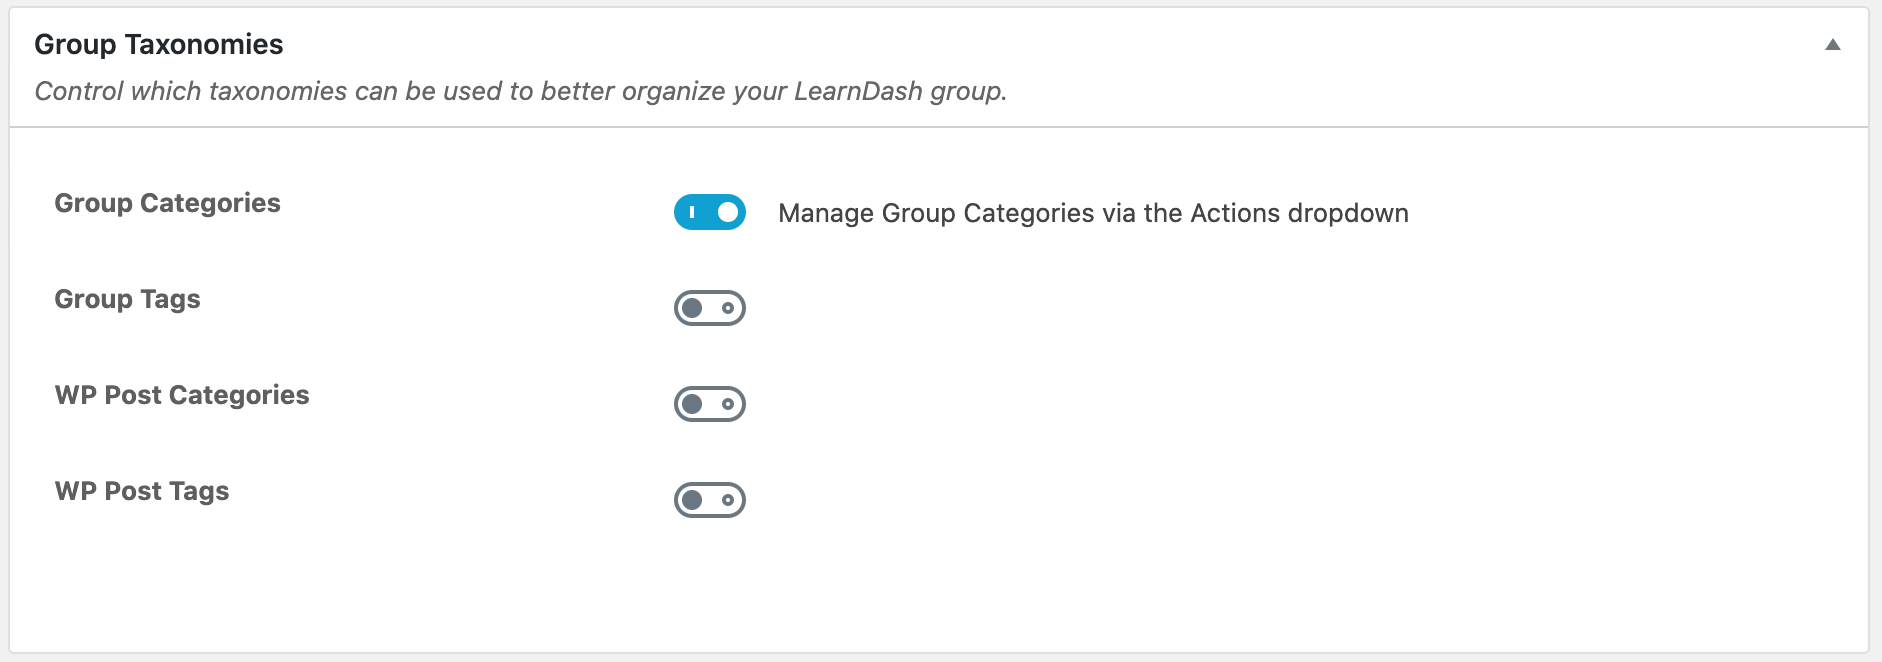
Using group taxonomies is completely optional, but they provide an additional way to organize your groups, especially if you have many offerings.
- LearnDash Group Categories: This enables you to organize your groups into custom categories that are only available for LearnDash Groups.
- LearnDash Group Tags: This enables you to organize your groups using custom tags that are only available for LearnDash Groups.
- WordPress Post Categories: This enables you to organize your groups using WordPress’ default category management system. These categories can be viewed & managed in the WordPress admin under POSTS > CATEGORIES. You can share them between both the Posts & Courses post types.
- WordPress Post Tags: This enables you to organize your courses using WordPress’ default tag management system. These tags can be viewed & managed in the WordPress admin under POSTS > TAGS. You can share them between both the Posts & Courses post types.
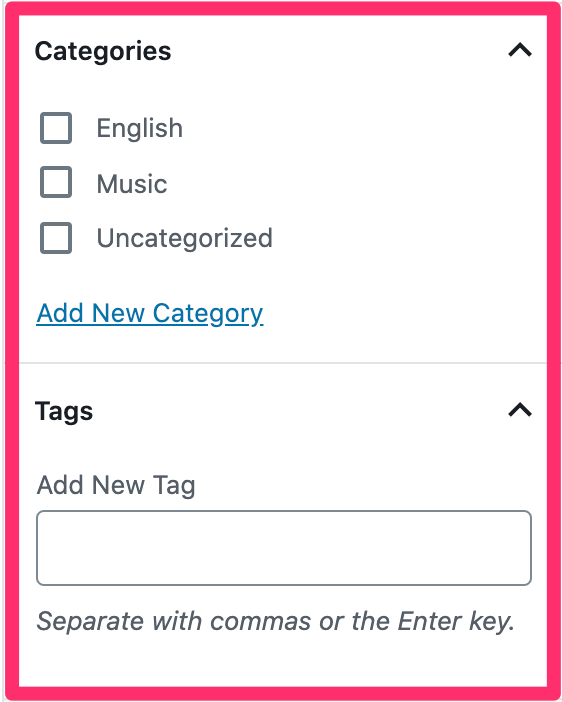

If these options are enabled, then you will see each of them in the sidebar of the editing screen. In the above screenshot, WordPress categories & tags are shown in pink, while LearnDash categories & tags are shown in blue.
TIP
WordPress has a good article on the difference between categories & tags, and when & how to use each one.
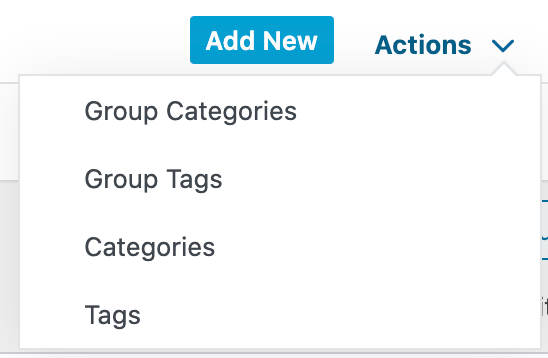
You can manage (add, edit, or delete) the WordPress and LearnDash Categories & Tags via the Actions menu:
- Navigate to LEARNDASH LMS > GROUPS
- Select the Actions dropdown menu
- Select your desired menu option
Group Content Protection
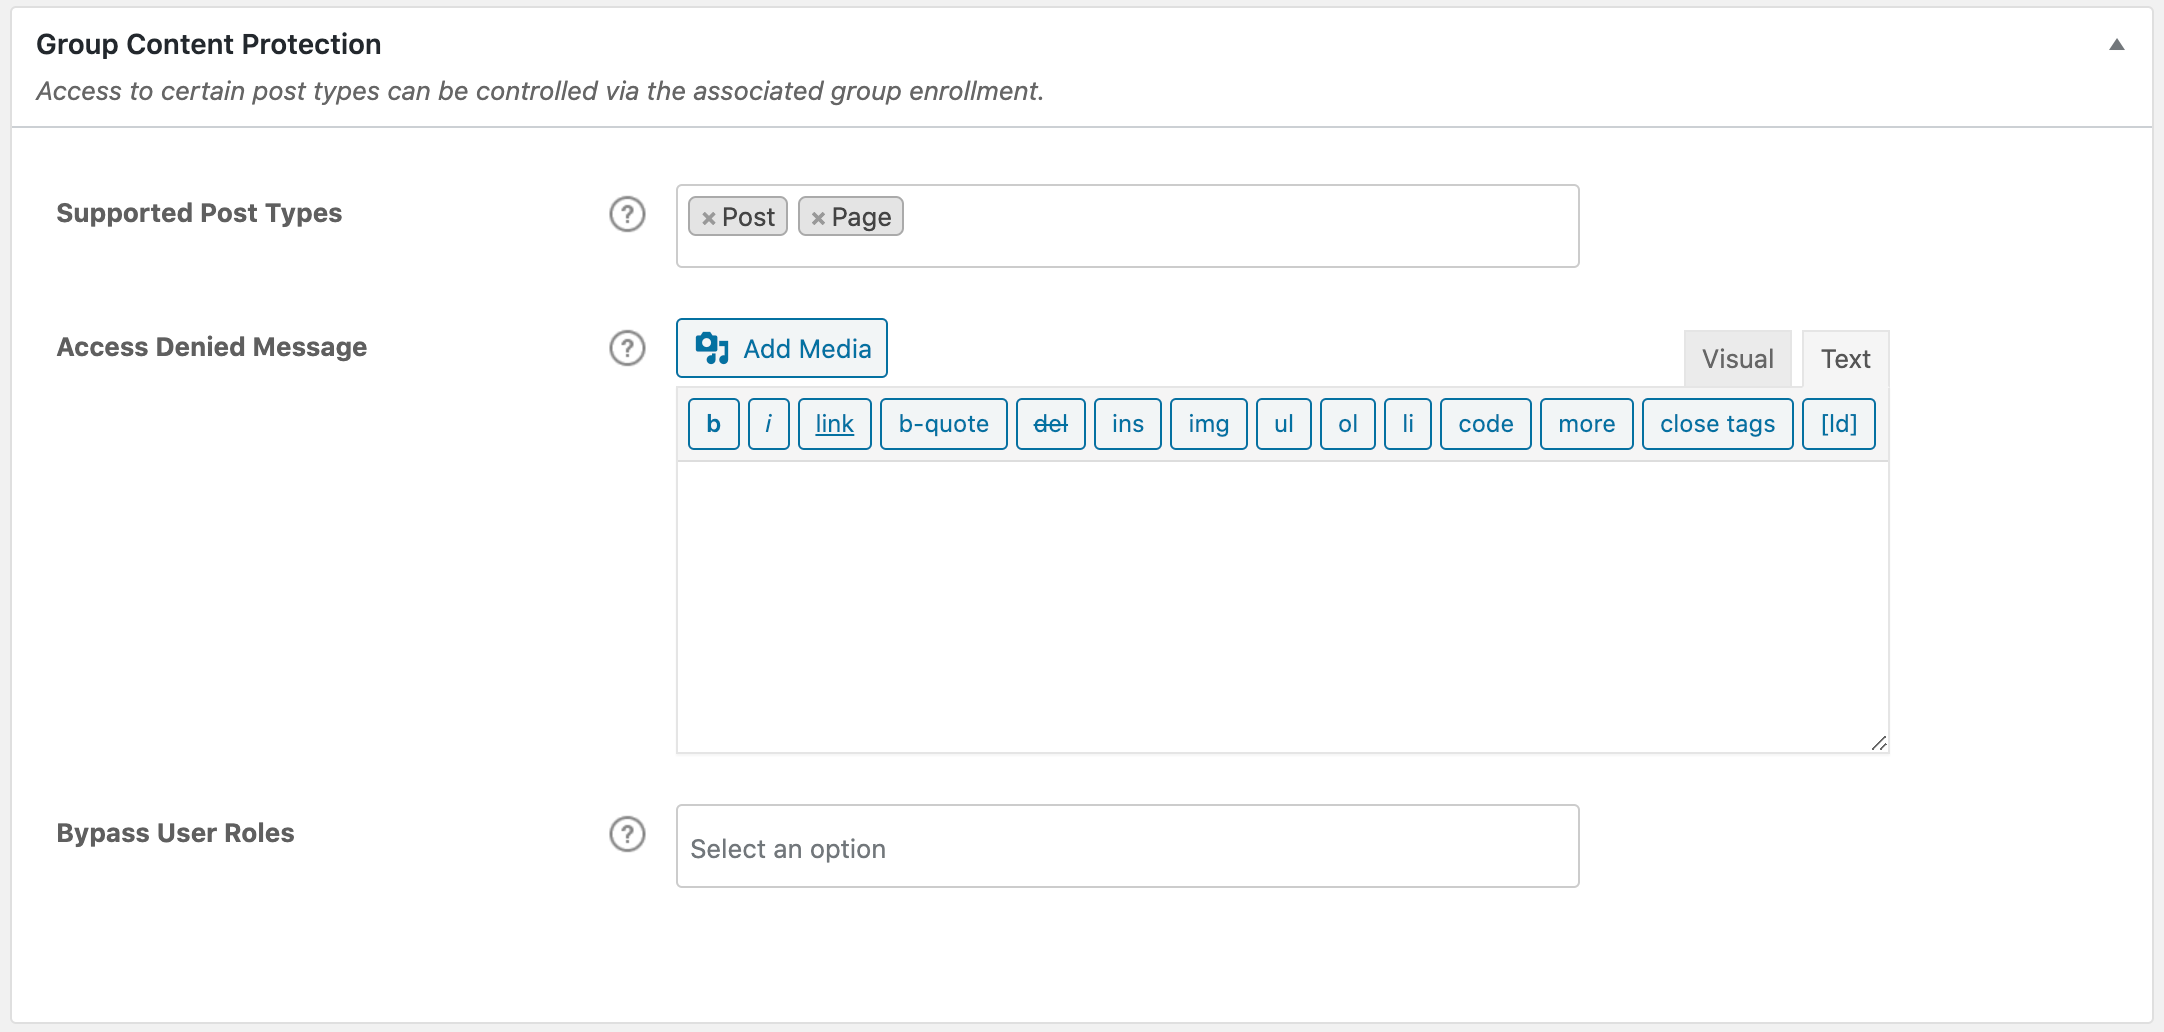
These options allow you to include WordPress pages and posts as part of group-protected content if desired. Once enabled, the settings are then managed directly on the specific page or post you wish to include in the group’s protected content.
- Supported Post Types: Globally enable WordPress posts and/or WordPress pages. Once enabled, each individual post / page will provide an option to protect it as part of a group.
- Access Denied Message: Include a custom message for pages and posts that are protected when a user tries accessing it without proper permissions.
- Bypass User Roles: You can select specific user role(s) to bypass the group enrollment requirement in order to view the protected page or post.
Even after you set the above options, by default your pages or posts are still not protected/restricted, you still have to do a few more setups on the posts or pages themselves. Once you’ve set up the Group Content Protection, for example, you selected to protect Posts and Pages, to complete the setup even further, you have to:
- Navigate to the post or page that you want to protect
- Scroll down to the bottom of the post or page until you see LearnDash Group Content Protection
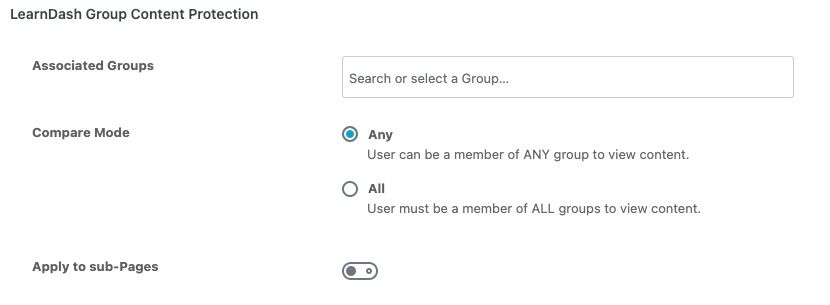
- Enter or select the group/s you want to associate with the page or post
- Set the compare mode:
- Any – a user can be a member of ANY of your selected groups to view the content
- All – a user must be a member of ALL of your selected groups to view the content
- Turn on the “Apply to sub-pages” if you want to protection to also cover subpages for this page
- Click Save or Update to save your changes
You have to do this to all individual pages and posts that you want to protect. If a user is not a part of the “Bypass User Roles” and is not a part of the groups you selected for the page or post, they will see the “Access Denied Message” that you set on the settings.