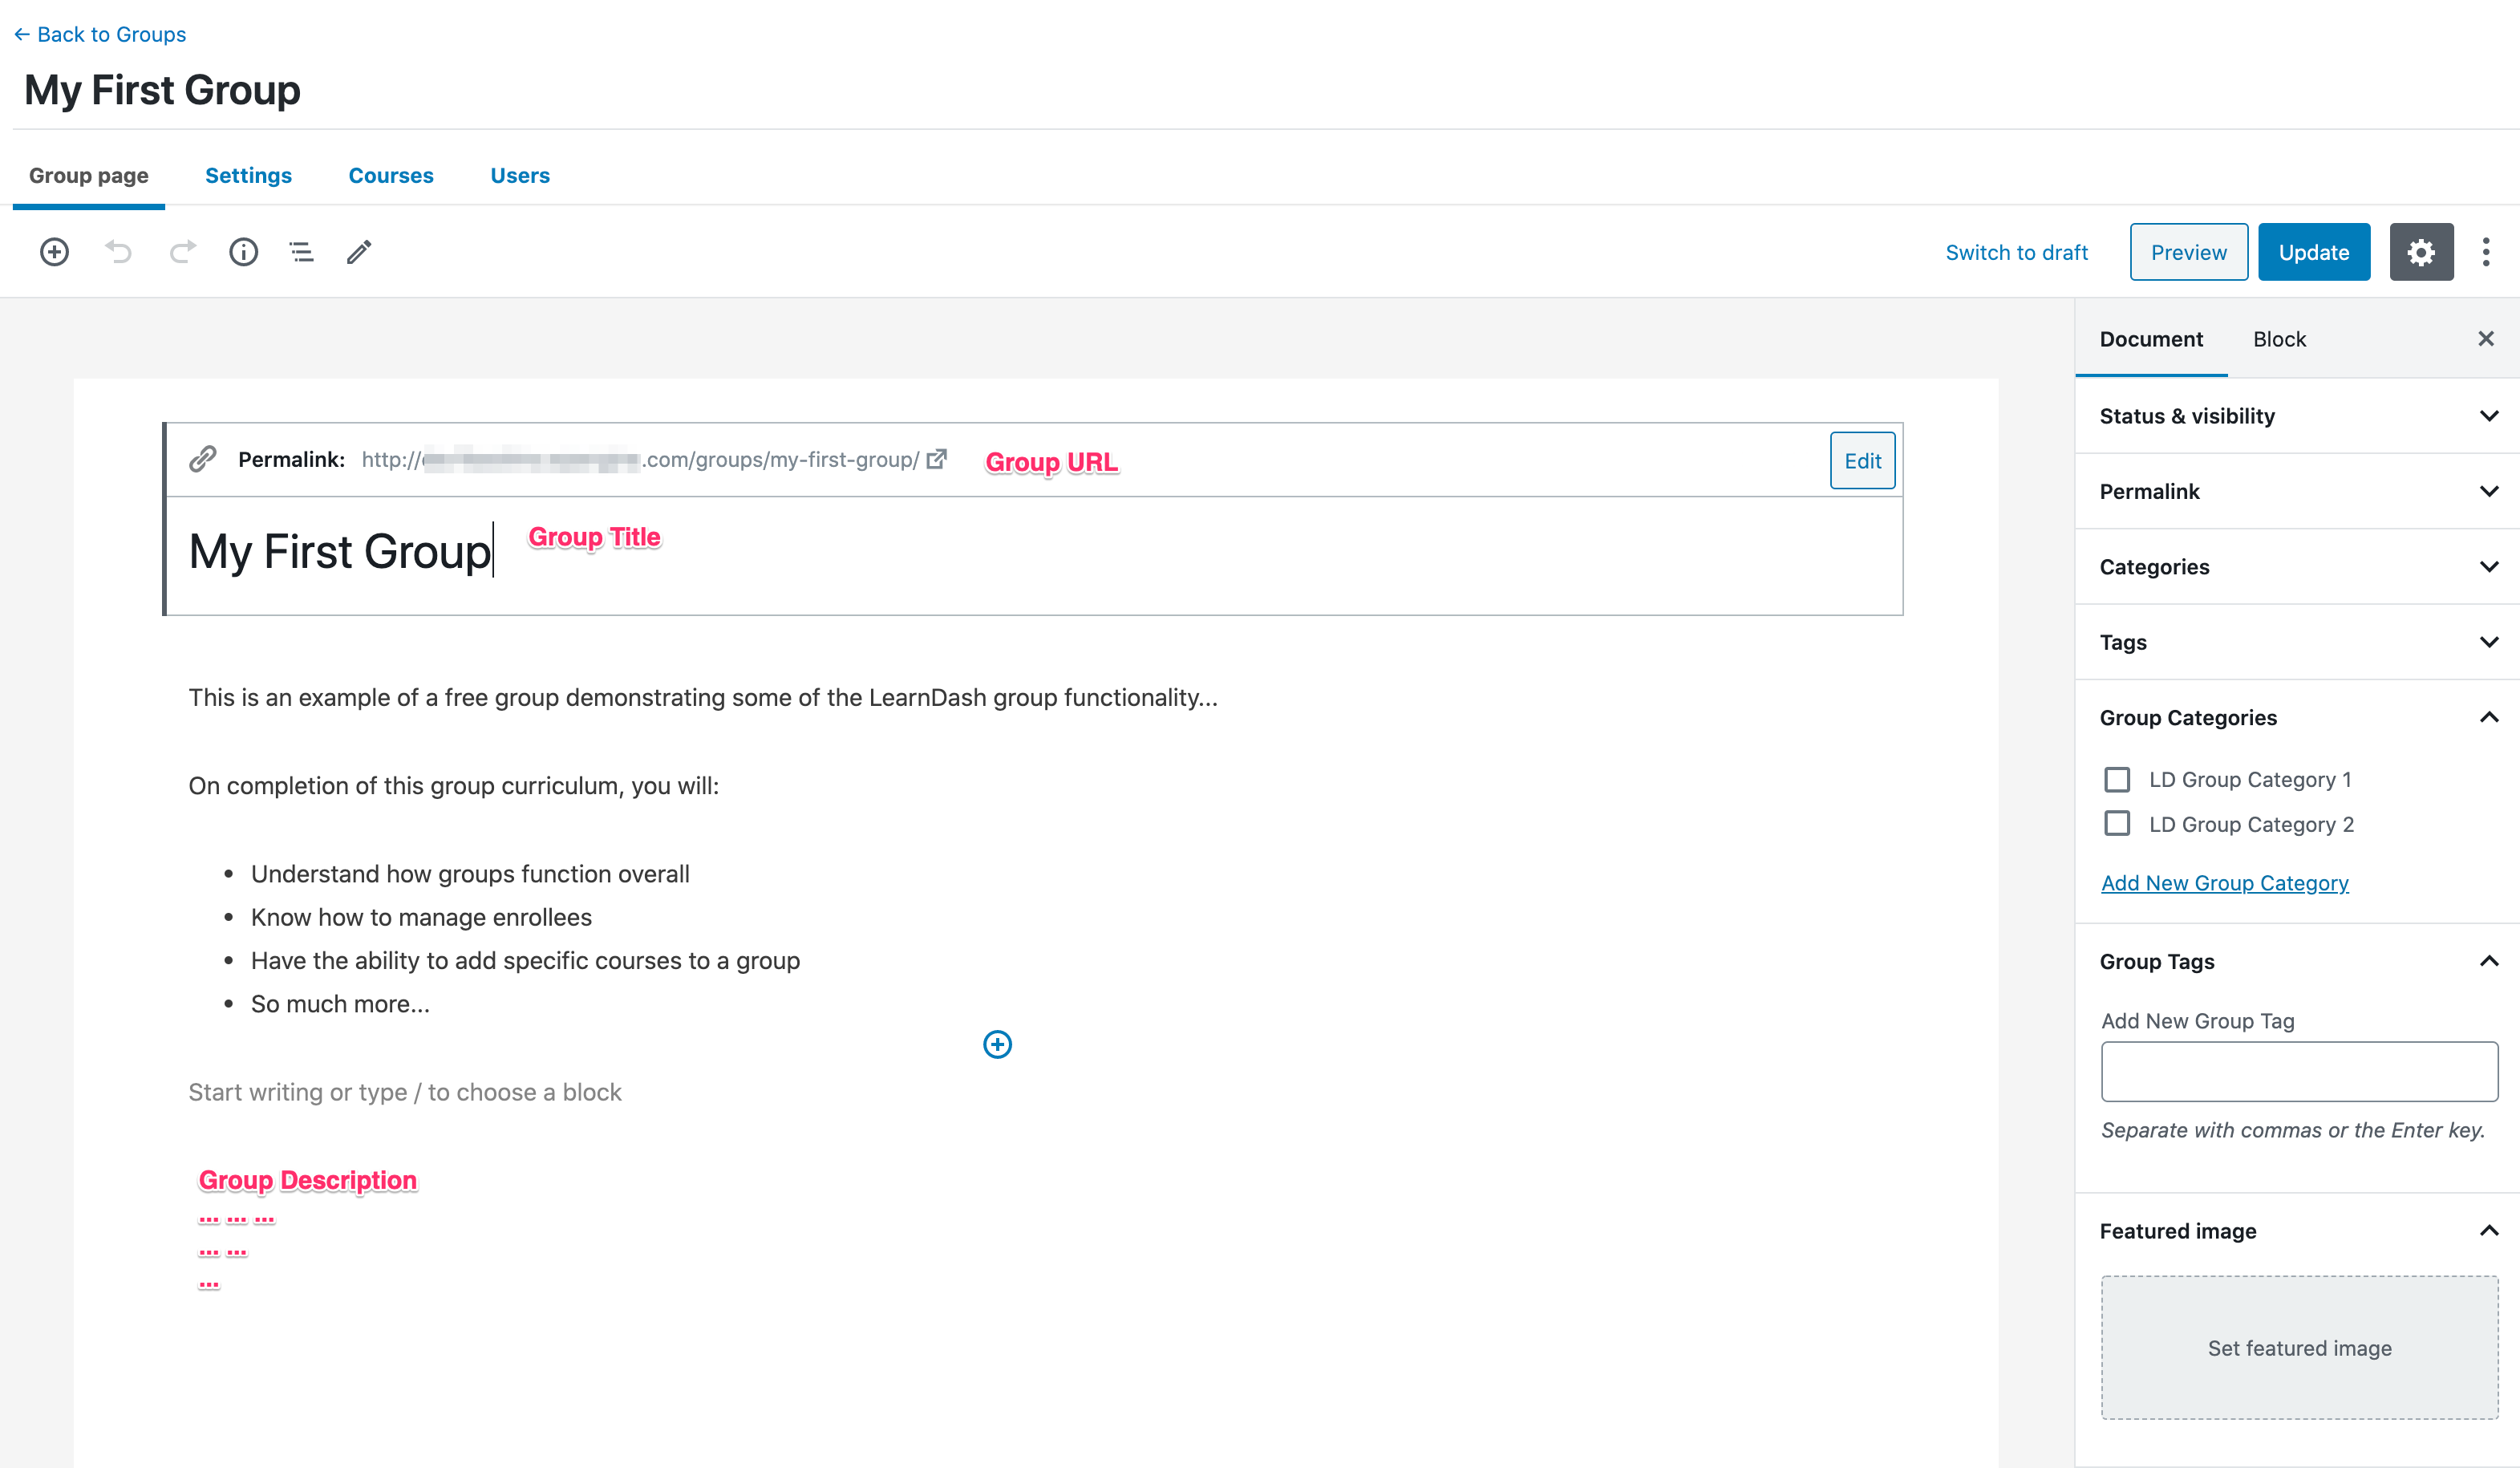
The Group Page content area is where you add a group title, description and featured image for your group. This is what people will see before they enroll into (or purchase) access to the group.
LearnDash will automatically add a course table with a list of courses associated to the group below the group description. Group Page content is your own custom information that will be displayed whenthe page is loaded underneath the “Group” tab.

Table of Contents
Where to Add a Group Page Content
- Navigate to LEARNDASH LMS > GROUPS
- Click on the group that you would like to edit
- You will automatically land on the Group Page tab
- You can immediately start adding your group description
GUTENBERG vs. CLASSIC EDITOR
This article assumes you are using WordPress 5.0 or greater, which includes the new WordPress editing experience (aka: Gutenberg). If you are using the Classic Editor plugin then your experience will be different.
PAGE BUILDERS
If you have chosen to use a page builder plugin (Elementor, Beaver Builder, Divi, WPBakery, etc.) to edit your group description, you should refer to that specific page builder’s documentation on how to add content.
Group Title
Your group title is the first thing you’ll see at the top of the editing screen. Look for a placeholder that says “Add Group title.” Most themes display the title near the top of the page, below your header and/or global navigation.
Group URL
When you click inside of the “Add Group title” box, you will see an area appear labeled “Permalink.” This is your group URL.

The first two parts of the URL are not editable but are determined by your (part 1) site’s domain name and (part 2) the group slug you have chosen (which will be /groups/, unless you customized your LearnDash permalinks).
You can edit the third part of the URL:
https://yoursite.com/groups/my-first-group-URL
In most cases, this should be the same as your group title.
- Click into the “Title” area, as if you were going to change your group title
- Click the “Edit” button next to the permalink
- Type your new permalink
- Hit Enter, or click the Save button
NOTE
The Public setting must be enabled in order for you to be able to edit the group URL or permalink. Navigate to LEARNDASH LMS > GROUPS > SETTINGS, under the “Group Custom Post Type Options” section.
Group Description
Everything below the group title is a blank canvas for you to add your description. This is powered by the same WordPress editor used for pages and blog posts.
For more information on how to use the Gutenberg editor, please see the official WordPress Editor documentation.
Shortcodes & Blocks
LearnDash introduces a number of shortcodes & blocks for you to use in this area. To see available blocks, add your cursor in the description area and from your keyboard, use the slash “/” command. You can then narrow the list down by typing keywords such as “group” or “LearnDash”.
For a more detailed look into all of the available options, please read our shortcode & blocks article.
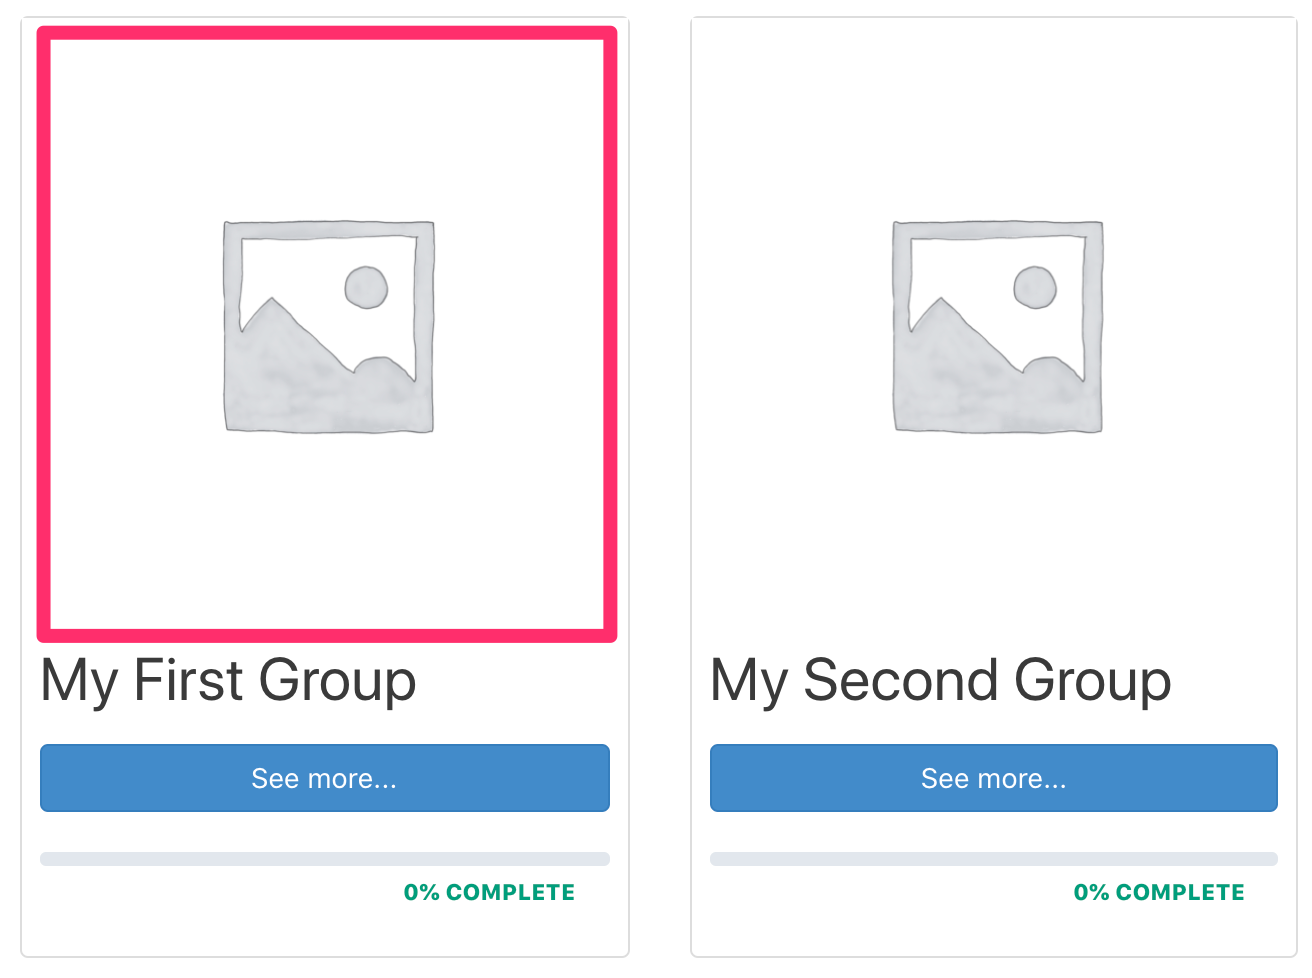
Group Featured Image
The featured image is the main image associated with your group. Most WordPress themes will display this image near the top of your group page. It is also the image LearnDash will display if you are using the course grid add-on along with the “LearnDash Group List” block or shortcode on a separate page.
- Look for the Featured Image panel in the sidebar (make sure you’re viewing Document settings, not Block settings)
- If not already open, click on it to open it
- Click Set featured image
- Choose an image from your Media Library, or upload a new one
- Click the Select button at the bottom
NOTE:
Where and how your course title, description & featured image are displayed is heavily dependent on your WordPress theme. If you’re experiencing layout issues with this content, please contact your theme developer.
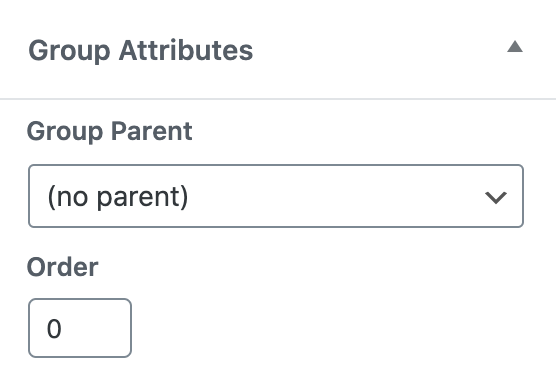
Group Attributes
The group attributes section works similarly to the default WordPress Page Attributes. There, you can specify the order of the groups (helpful if using Menu Order), as well as set a parent group if you have enabled the Group Hierarchy setting.
- Group Parent allows you to select a parent group for the current group being edited. Group hierarchy is level-based. This means that any user enrolled in the parent group will have automatic access to the sub-groups. A user can however enroll into a sub-group by itself, without gaining access to the parent group.
- Menu Order allows for controlling the order in which the groups appear. For example, when courses are listed via the LearnDash Group List block when the “Order by” option is set to Menu.