
The LearnDash OnBoarding Wizard is the newest addition to LearnDash version 4.0. This makes it easier for users with new installs of LearnDash set up their courses, lessons, and even payments. The wizard takes care of all the essential set up and even downloads all the necessary plugins for your convenience.
With just four easy steps you can go from having a fresh install of LearnDash to having all your add-ons, third party plugins, and even settings set up for you and ready to go. All you need to do is add in your courses, lessons, quizzes, etc. and you’ll be ready to go.
Table of Contents
The User Interface
Let’s explore the four easy steps to the LearnDash OnBoarding Wizard.
Step 1: Your Info
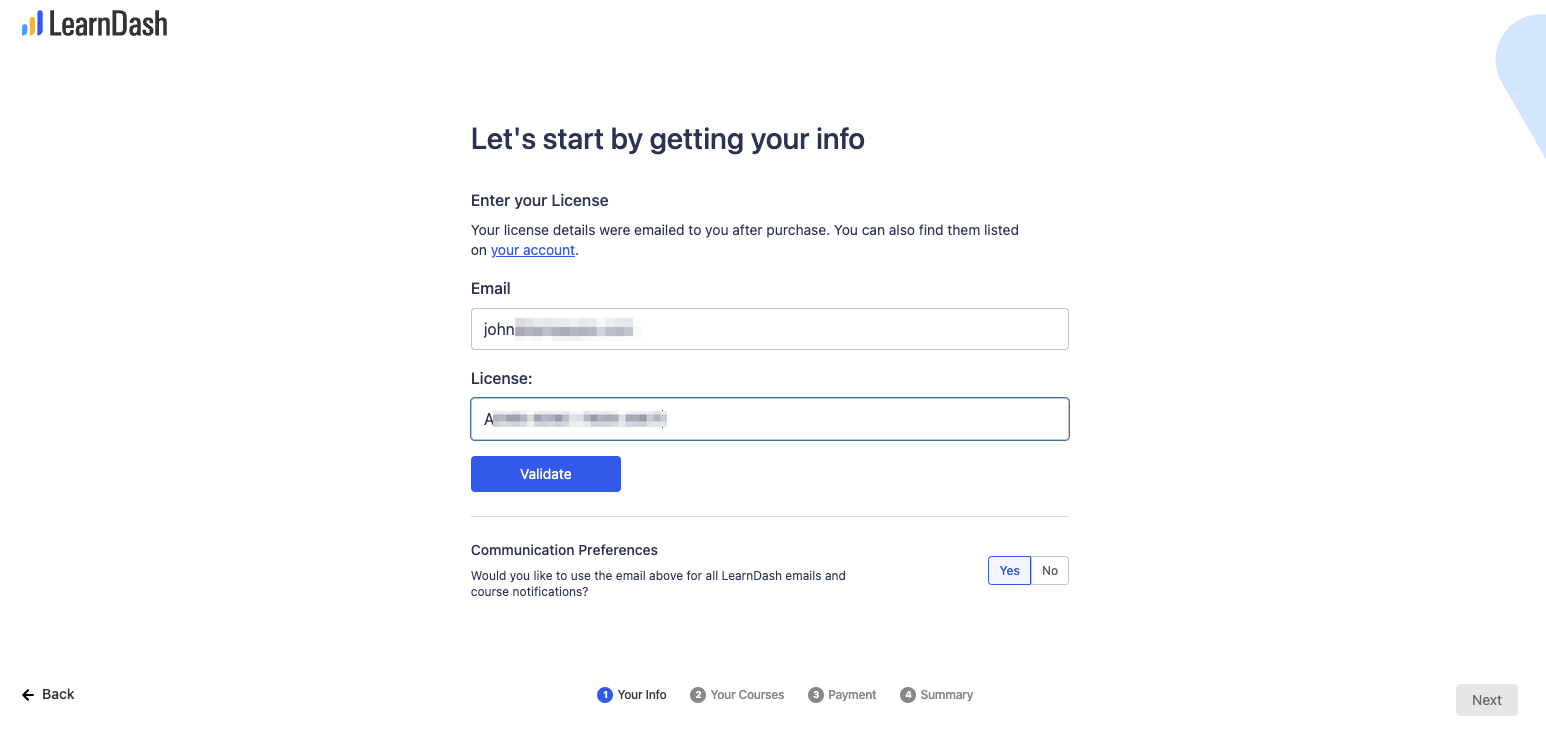
The first step to your OnBoarding experience is validating your LearnDash License. All you need to do is to:
- Fill out the email that you used to purchase LearnDash and
- Enter the license details that were emailed to you after your purchase.
If you can’t find your license details, there’s also a link to log in to your LearnDash account to get those information.
Once you’re done entering the details, click on Validate to check if the license information that you entered is valid. You should see a green prompt that says “Your Iicense is valid” if a valid license is found.
You can also opt in to the “Communication Preferences” that would allow you to use the email you entered above as the main email for all LearnDash emails and course notifications.
Once you’re done, click on next to go to the next step.
Step 2: Your Courses
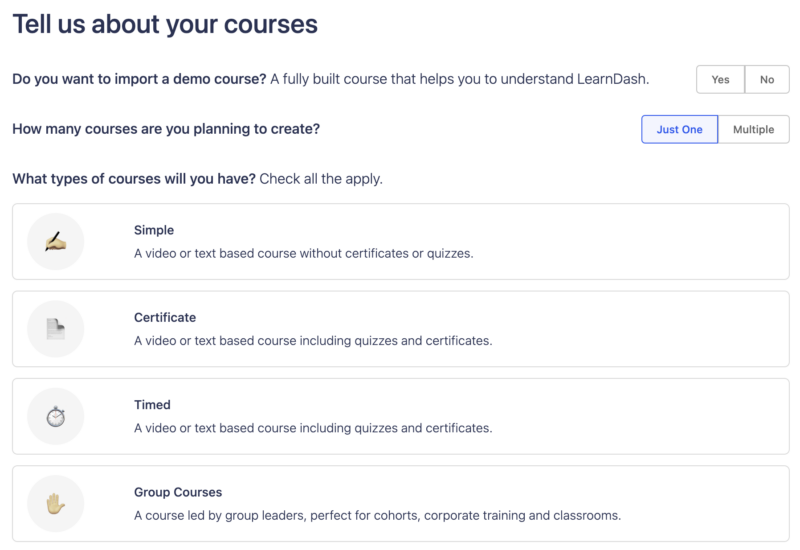
The next step for the OnBoarding Wizard is to set up your course structures.
In this section, you can choose whether you’d like to import a demo course. If you aren’t already familiar with using LearnDash, this is a great start to help you get a general overview of what a course can look like.
Next, you can indicate how many courses you are planning to create. Select either “Just One” or “Multiple”. This would allow the wizard to set up your course listing and settings accordingly.
Next, you have to select all that apply to the type of courses you will have:
- Simple – for text based courses without certificates or quizzes.
- Certificate – a video or text based course including quizzes and certificates.
- Timed – a timed video or text based course including quizzes and certificates
- Group Courses – a course led by group leaders, perfect for cohorts and corporate trainings and classrooms
If you select the group courses, you are also asked the questions such as:
- Are your groups public or private?
- Who will be leading your group courses?
Answering these questions will help the wizard properly set up your group settings for you.
Selecting the appropriate course types from the above choices will help the wizard determine which plugins and add ons will be right for you, as you will see in Step 4.
Once you’re done, click on next to go to the next step.
Step 3: Payment
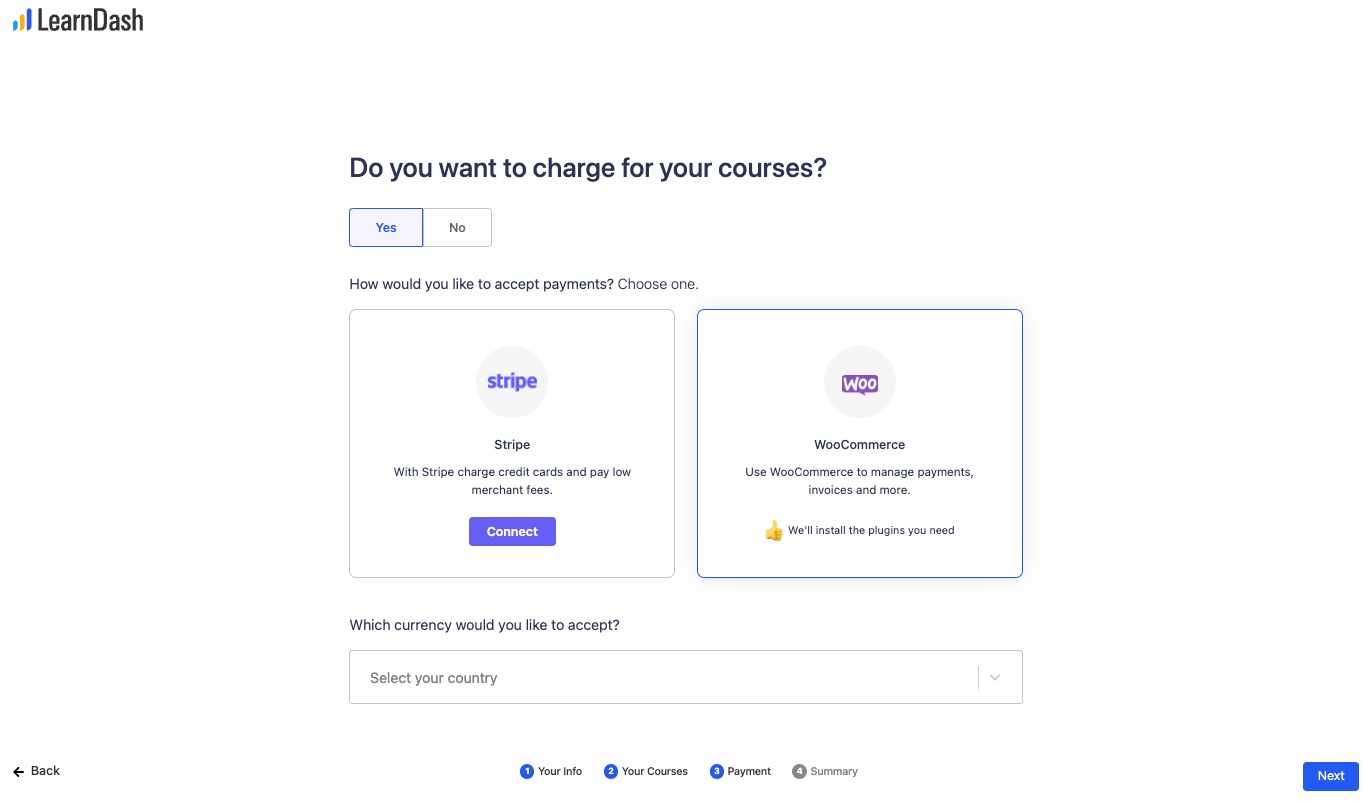
On this next step, you are going to be asked whether or not you would like to charge for your courses. This will help you set up payments, if needed, for your courses.
If you select “Yes”, you will be presented with two options: Stripe or WooCommerce.
Stripe Connect is now built in to LearnDash 4.0, meaning you no longer have to install a separate add-on and the set up is much easier too. If you will be asking your users to pay via credit card, stripe is the easier option. Click on “Connect” to connect your Stripe account to your LearnDash website. If you don’t have a Stripe account yet, you can also create a new account by clicking that button. Check out our Stripe Connect Documentation to learn more. You can set this up further on your LearnDash settings.
If you want to customize your payment system and process further, have subscriptions, free trials, manage your invoices, etc., then WooCommerce might be the right solution for you. Select WooCommerce if that’s the option you’d like to go with and the wizard will install the necessary plugins for you. You can set it up further later in your WordPress Dashboard.
There are other payment solutions that LearnDash can work with, including PayPal and other payment gateways. If you want to use those, you can skip this part and set them up later.
Once you’re done selecting the payment system that you’d like to use, choose the currency that you would like to accept from the drop-down menu.
Once you’re done, click on next to go to the next step.
Step 4: Summary
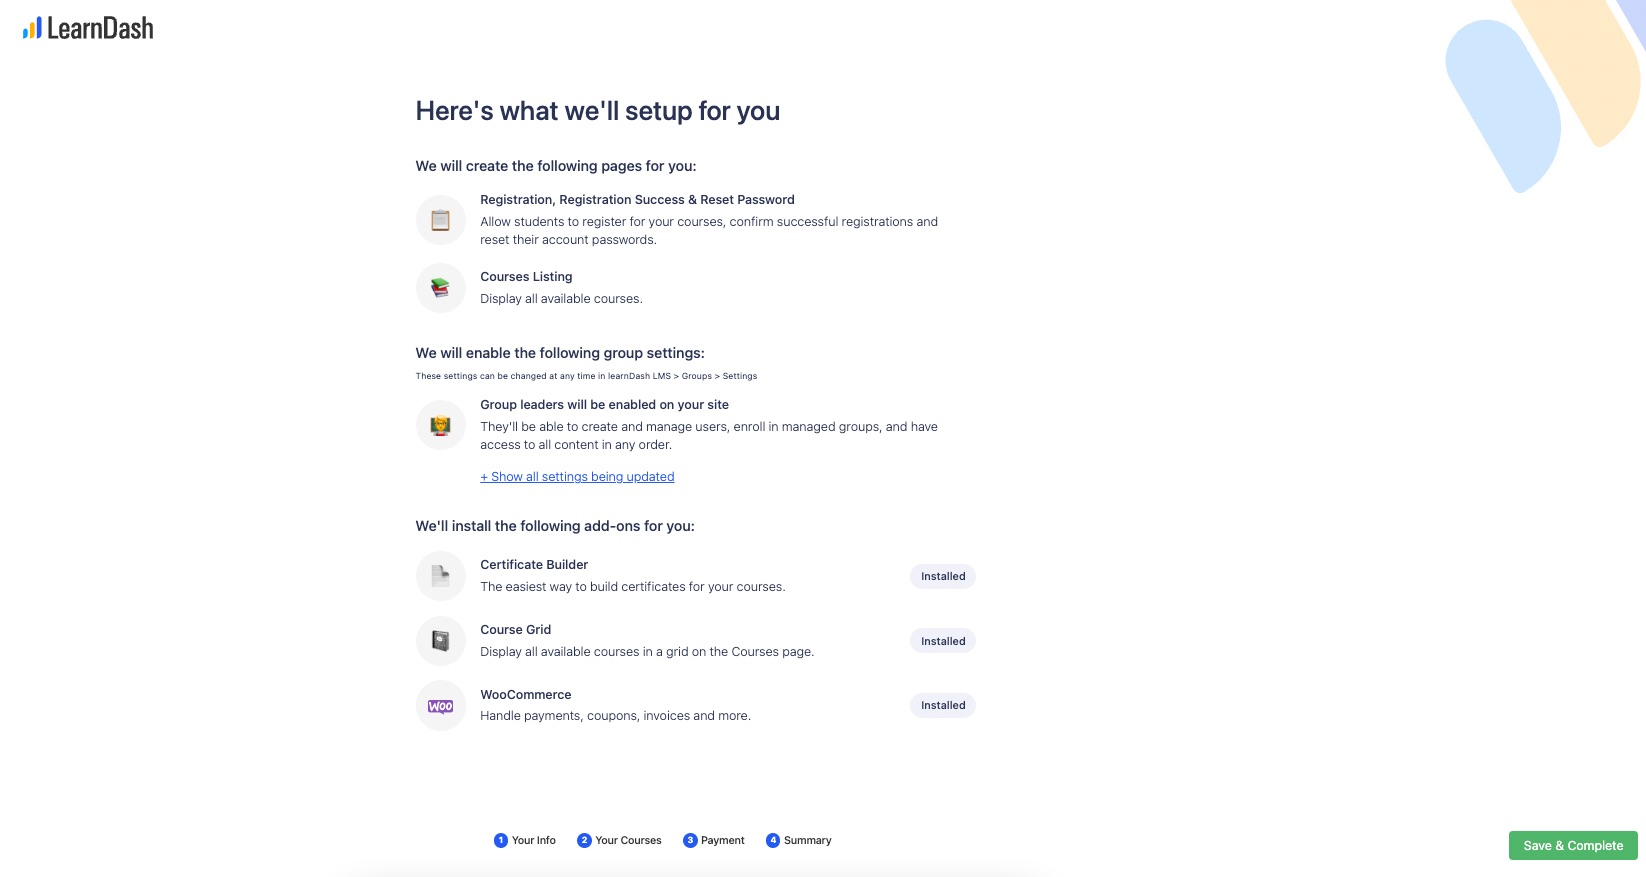
The final step in the OnBoarding Wizard is the summary. Based on your selections on the previous steps, this will display all the actions that the wizard will take to complete your set up.
Anywhere from enabling registration, registration success and reset password pages, course listings, group settings, to installing add-ons such as the Certificate Builder, Course Grid, and WooCommerce will be done once the set up is completed.
If you selected and enabled the Group settings, you will further have the option to customize and set up your Group Settings by clicking on “+ Show all settings being updated”:
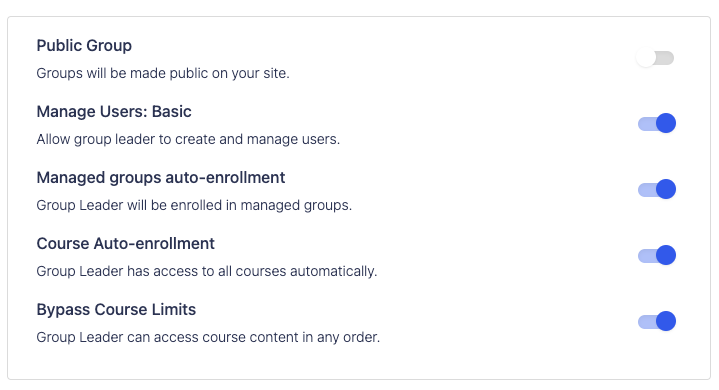
Enable and disable the ones based on your preferences.
Hit “Save & Complete” to finish the OnBoarding Wizard and apply the settings that you have selected. This will also install the plugins that you will need.
Take note that you can still change and update the settings and preferences that you selected on the OnBoarding Wizard from the individual settings on LearnDash on your WordPress Dashboard. You can check out our complete documentation on each of the options and settings on our Support Website.
FAQ
Can I run the OnBoarding Wizard more than once?
-
- Since the OnBoarding Wizard only automatically runs with a fresh install of LearnDash, officially, you can only run it once. But check out the next question on how to override that.
Can I run the OnBoarding Wizard at an old install of LearnDash?
-
- You can override this by adding:
/wp-admin/admin.php?page=learndash-setup-wizardat the end of your website URL to force the OnBoarding Wizard to show.
- You can override this by adding: