Build Your Email List by Offering Free Lessons
If you are selling an online course then one of the best ways to build your email list is by giving away a free lesson.
Marketing is the name of the game when it comes to online product sales, and that includes courses. Sometimes people will purchase right away, while other times they may need more time. If you are able to provide useful content to these prospects during this time then you increase your chances to secure the sale.
The most common way to do this is by offering free lessons. Your intent here is not offer useful (persuasive) content for your prospective customer. Don’t give them a watered-down version of your course. Really make sure the content is valuable.
The trick to getting the most out of this approach is to also capture the email address of the individual so that you can include them on any promotions or marketing messages to help them make the purchase. For instance, giving a simple discount code might be enough to get someone to commit.
One way that this can be easily accomplished is by using LearnDash and two free plugins.
In this example we will assume that you are using Mailchimp for your email marketing. To make this strategy work, you just need:
- Mailchimp for WordPress plugin (free)
- Restrict Content plugin (free)
- LearnDash
Step 1: Configuring Mailchimp for WordPress
First you need to configure Mailchimp for WordPress. You need to connect your Mailchimp account with an API key so that your site can communicate with your MailChimp account. As the video points out, you just need to go to the Account area, and clicking “API Keys” under the “Extras” menu in Mailchimp.
Once you have the API key, just paste it into the settings. You will know that the account is properly synced when you can see your email lists (on Mailchimp) appear like so:

Now that the account is synced you can go to the integrations menu and turn on the “Registration Form Integration”. This integration will send the email address of anyone who registers for your site to your specified Mailchimp email list. Your settings should be as follows:

Step 2: Configuring Restrict Content
Now with Mailchimp configured it is time to set-up the messaging for visitors. This is pretty easy as it only involves one step. You can do this by going to SETTINGS > RESTRICT CONTENT.
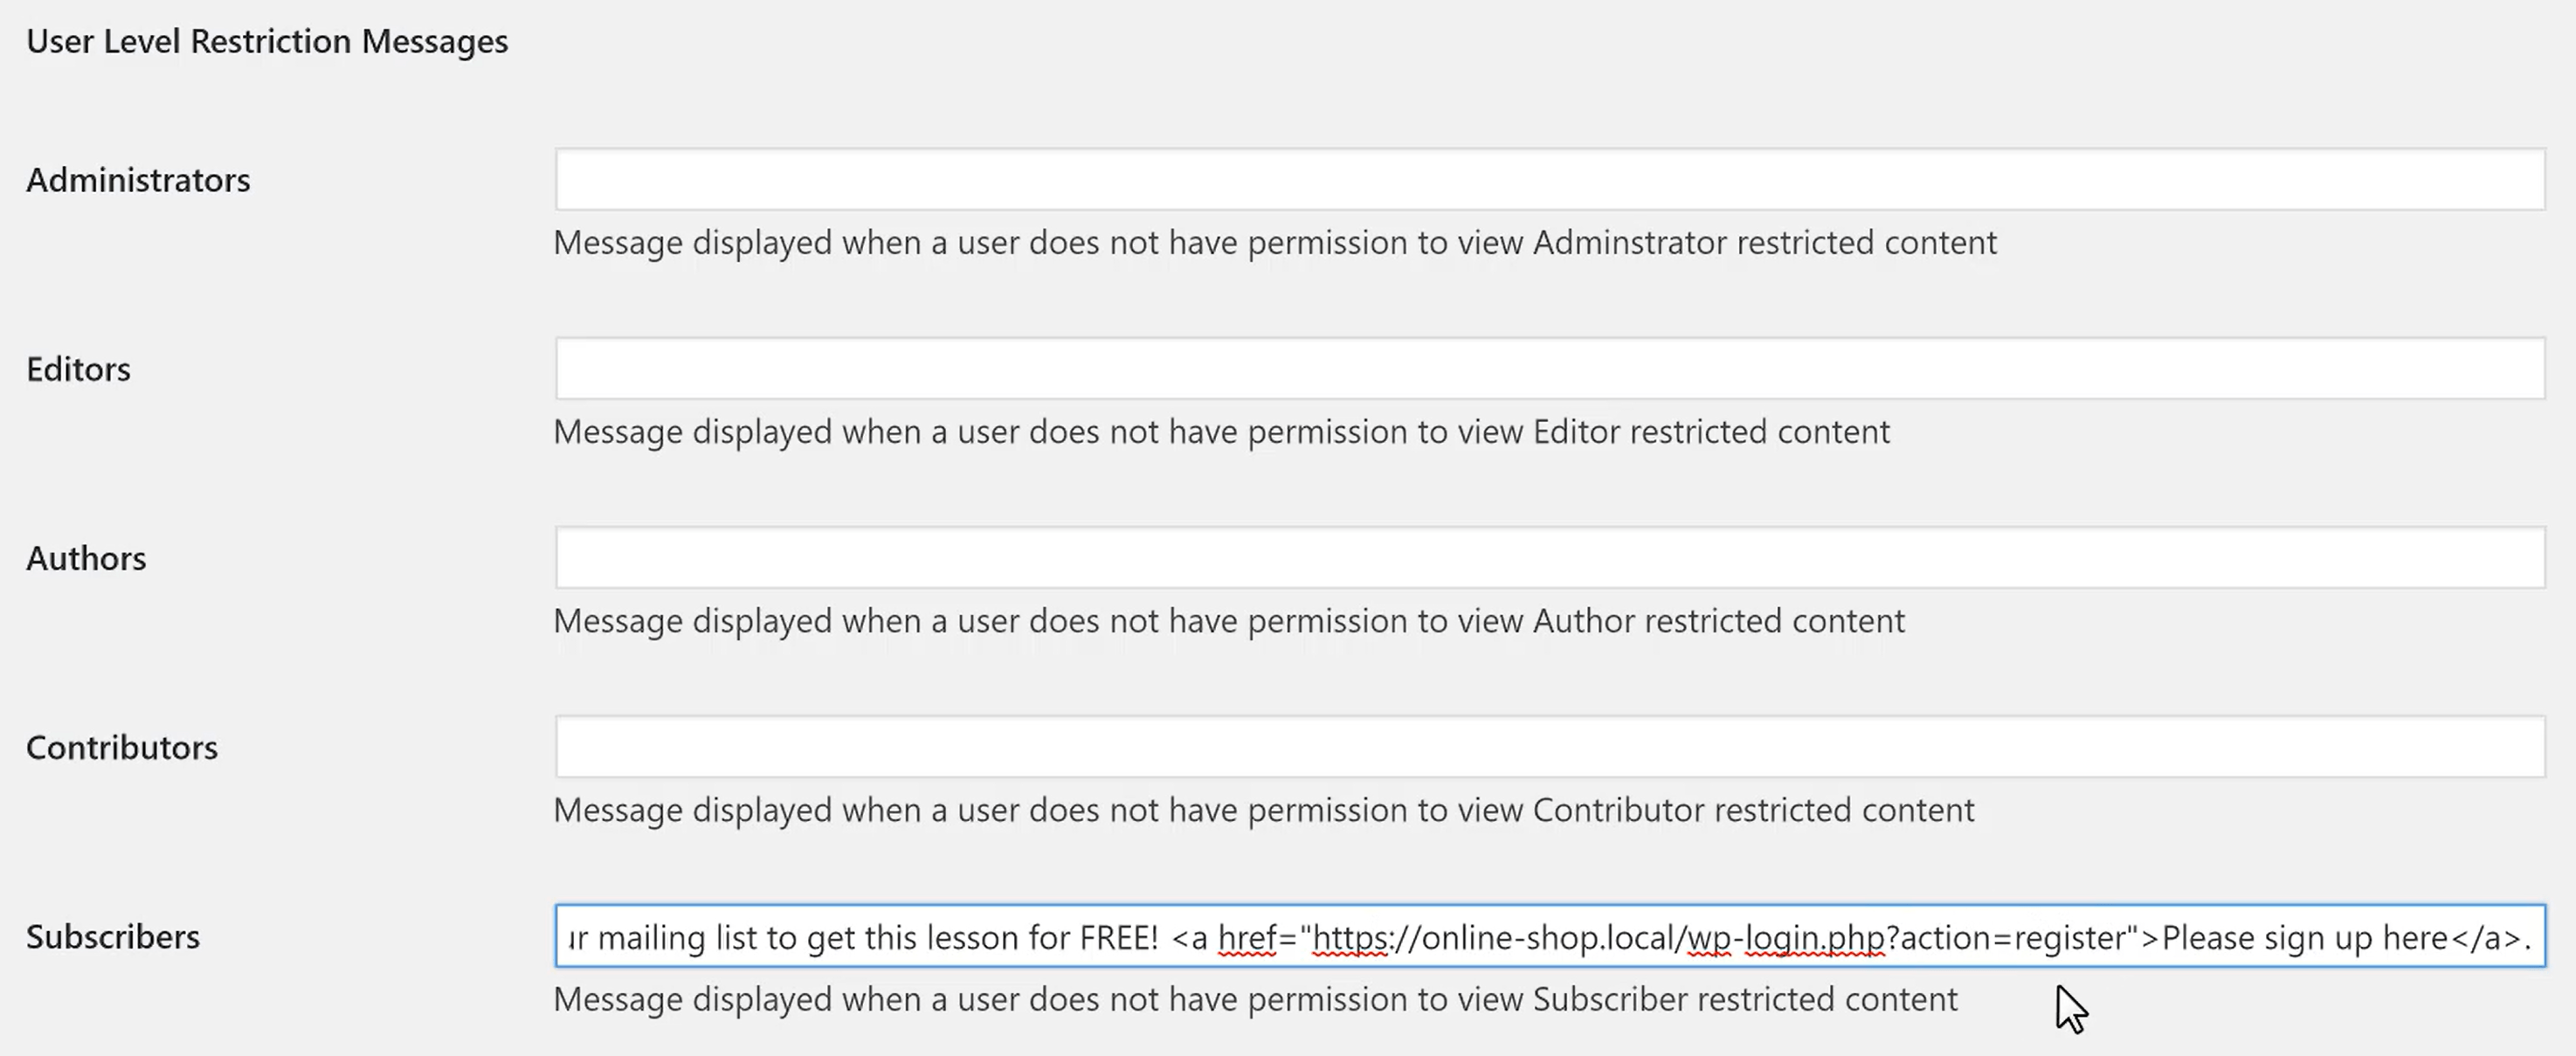
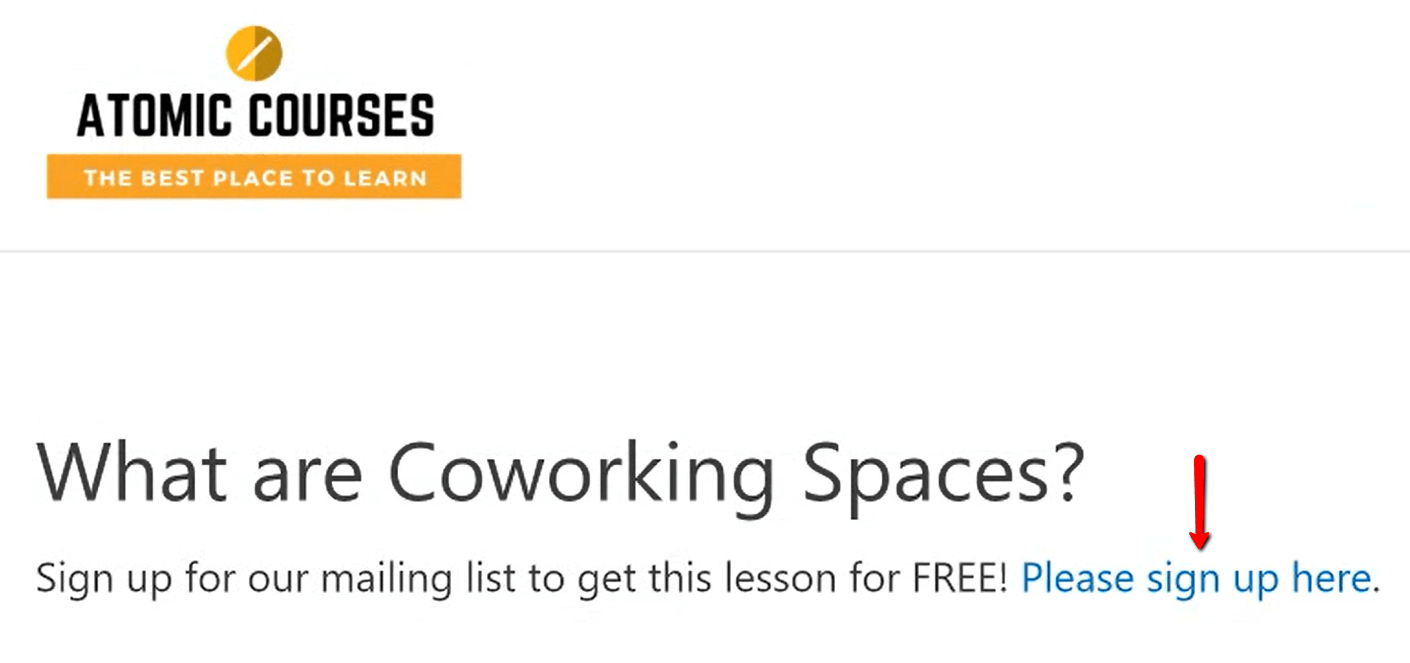
On this page you will see that there are many different messages that you can create. The only message you need to configure is the one for Subscribers. As the video demonstrates (and as shown in the screenshot above), this is the message that is displayed when a user does not have permission to view Subscriber restricted content.
It is important to include a URL to your registration page in this message, as demonstrated above.
Step 3: Configuring the Sample Lesson in LearnDash
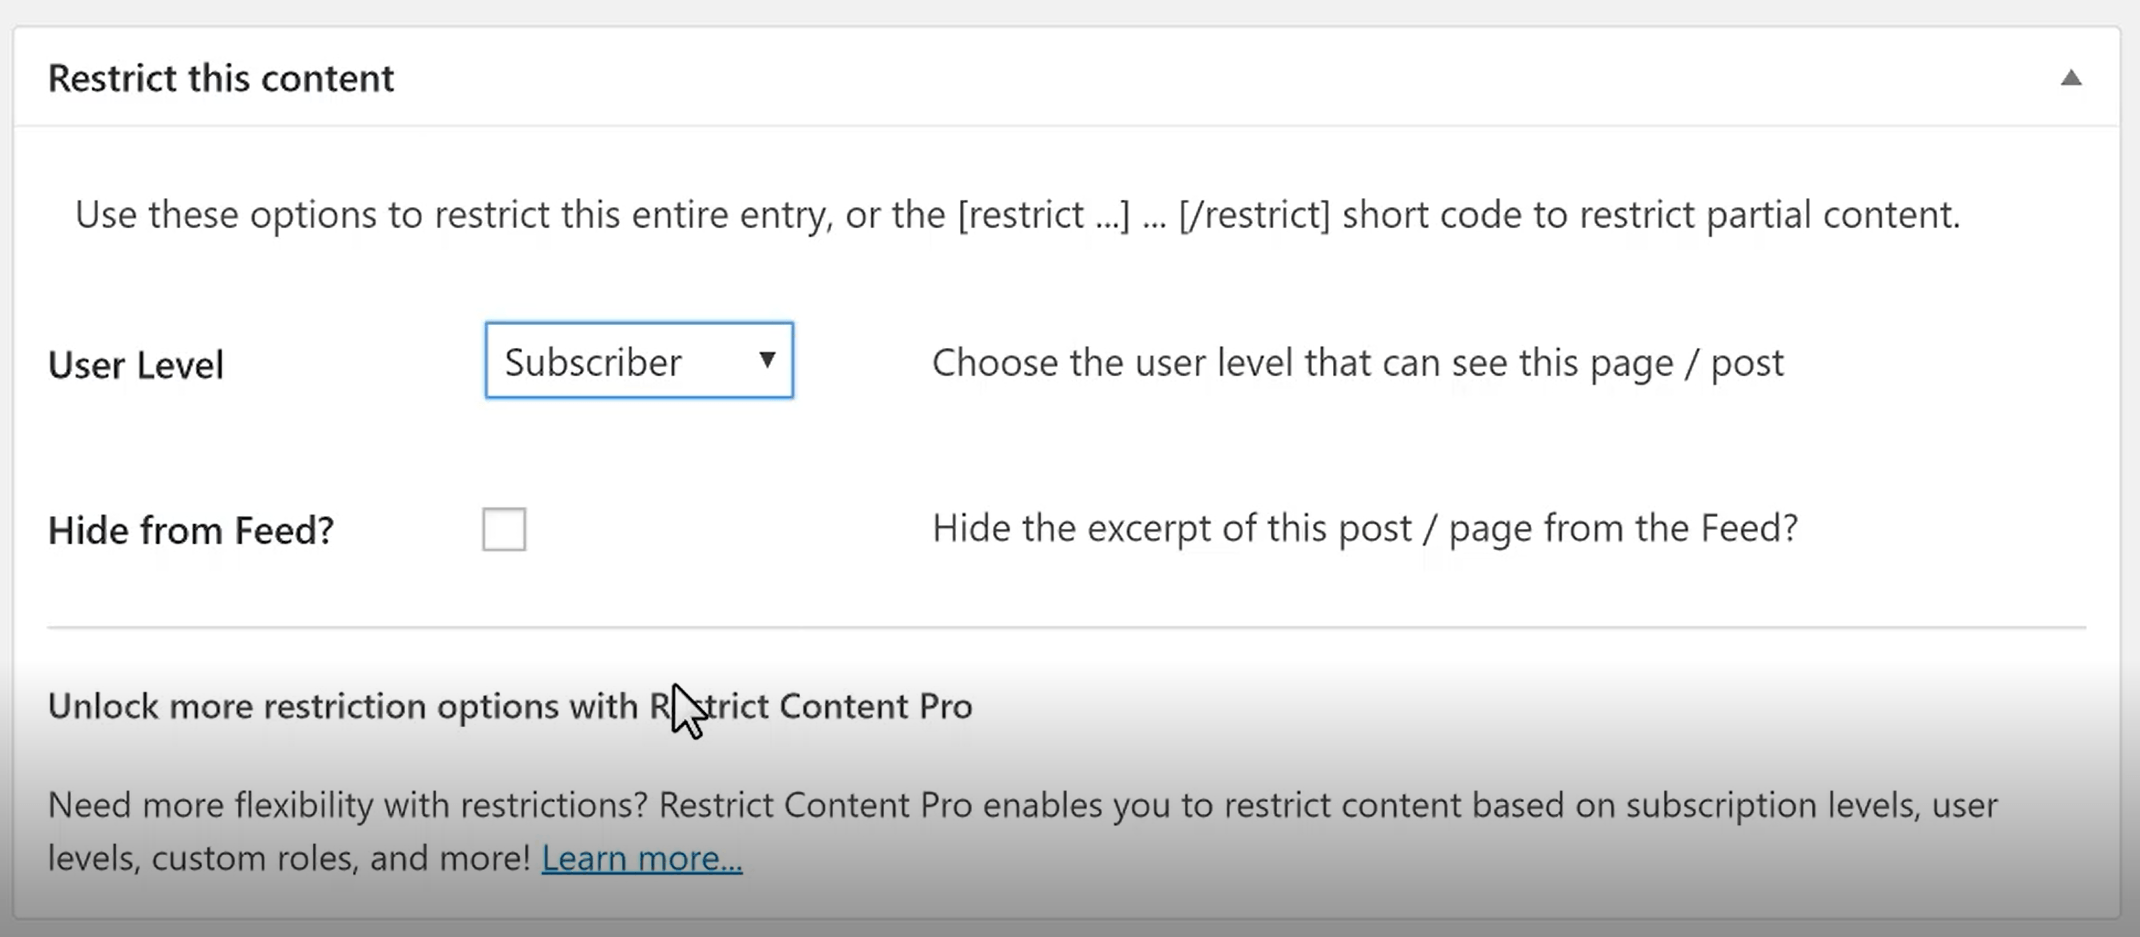
The last step in the process is to specify the free (sample) lesson in LearnDash. Select your desired lesson, then scroll down to the settings.
In the settings, select the “Sample Lesson”.
When a lesson is marked as a “sample”, it is visible to anyone without the need to log into the site in order to view. If you recall, you configured new registration emails to be sent to Mailchimp in Step 1. This being the case you need to require that a user must register in order to view the sample lesson content (and therefore, they will be added to your email list).
To do this, find the options for Restrict Content and select Subscriber from the menu.
Once this setting is configured you can save your lesson. Now when someone visits the free lesson, they will see the message that you included in Step 2.
That’s it!
You are now ready to start offering free, sample content for your premium course while in the process collecting a valuable list of email leads. Provide them with more useful content or even discounts for your course to help secure the sale!

Justin Ferriman
@LearnDashLMS